
Console User Manual

# Preface
This document is the user manual for Apusic In-Memory Data Cache (AMDC) V2.0.4 console product, providing detailed instructions on the usage, configuration methods, and management operations of the AMDC Web console features.
# Target Audience
This document is intended for AMDC product operations engineers, IT system operations engineers, development engineers, and other personnel.
# Related Documentation
For more information about AMDC V2.0.4, please refer to the following AMDC V2.0.4 product manual documentation set:
| No. | Document | Description |
|---|---|---|
| 1 | Apusic In-Memory Data Cache V2.0.4 Quick Start Guide | A brief introduction on how to quickly get started with AMDC. |
| 2 | Apusic In-Memory Data Cache V2.0.4 Installation Guide | Detailed introduction on how to install AMDC on various operating systems, AMDC service start/stop operations, and product registration process. |
| 3 | Apusic In-Memory Data Cache V2.0.4 Core User Manual | Detailed introduction on how to use, configure, and manage AMDC features and supporting tools. |
| 4 | Apusic In-Memory Data Cache V2.0.4 Console User Manual | Detailed instructions on using and operating AMDC console features. |
| 5 | Apusic In-Memory Data Cache V2.0.4 Development Guide | Detailed instructions for developing AMDC client applications using various programming languages. |
| 6 | Apusic In-Memory Data Cache V2.0.4 Migration Guide | Detailed instructions for migrating AMDC from historical versions to V2.0.4, as well as migrating from Redis to AMDC. |
| 7 | Apusic In-Memory Data Cache V2.0.4 Operations Guide | Detailed instructions for AMDC monitoring, operations, security hardening, and other operational procedures. |
| 8 | Apusic In-Memory Data Cache V2.0.4 Performance Tuning Guide | Detailed instructions for AMDC performance tuning. |
# Technical Support
AMDC products provide comprehensive technical support services. You can obtain technical support through the following channels:
Website: www.apusic.com
Phone: 400-855-5800
Email: support@apusic.com
Kingdee Cloud Community: https://vip.kingdee.com/?productId=73&productLineId=14&lang=zh-CN
When requesting technical support, please provide the following information:
Your name
Company information and contact details
Operating system and version
Product version number
Detailed information including logs, screenshots, etc. of any exceptions or errors
# Introduction
Apusic In-Memory Data Cache Software (Apusic In-Memory Data Cache, abbreviated as AMDC) is a distributed cache software that is fully applicable to various scenarios, with high throughput and data security, providing secure and reliable cache support capabilities for large-scale, high-concurrency, and high-availability key applications; and is compatible with Redis protocol and persistent data files, enabling simple, fast, and smooth replacement of Redis.
# Feature List
# Console
| Feature | Description |
|---|---|
| Multi-tenant Management | Use multi-tenant model to isolate data for different businesses or management groups. |
| Permission Control | Provide function usage permission control to improve console security. |
| Multi-cluster Management | Provide cluster management, node start/stop, node elastic scaling, configuration and other functions for multiple clusters. |
| Monitoring and Alerting | Provide cache monitoring function, detect cache status, and send alert notifications when cache core is abnormal. |
| Data Analysis | Provide cache data analysis functions such as big keys, hot keys, slowlog, etc. |
| Automatic Deployment | Implement automatic deployment function for AMDC data cache engine, the system automatically completes the whole process, faster and simpler. |
| Visual Scaling | Provide visual scaling operations without tedious command operations. |
| Task Center | Deployment process/scaling process visualization. |
# Related Concepts
| Term | Meaning | Usage Notes |
|---|---|---|
| Master Node | Stores data, responsible for data read/write, responsible for data synchronization | AMDC default mode, standalone mode. In standalone mode, the master node is standalone mode |
| Slave Node | Replicates data from master node, responsible for data read/write, does not participate in data synchronization | Slave node does not participate in data read/write, only responsible for data synchronization. When master node fails, slave node automatically switches to master node. When master node recovers, slave node automatically switches back to slave node. |
| Sentinel | Monitors master-slave nodes, responsible for master node failover, responsible for master-slave node synchronization | Sentinel mode. When master node fails, automatically switches to slave node. When slave node fails, automatically switches to master node. |
| Cluster | Computer service system composed of multiple independent computers | In this document, master-slave/sentinel/cluster three modes can all be considered as clusters. Cluster mode specifically refers to the mode with multiple master nodes for data sharding storage. |
# Usage Introduction
AMDC Console is a Web-based management and monitoring tool that supports cache monitoring, automatic deployment, cluster/node management, scaling, ACL management, automatic alerts, real-time configuration, web shell, permission control, and other functions.
# Common Functions
Refers to functions and pages that all roles have permission to use.
# Login
After deployment is complete, open a browser (Chrome or Firefox recommended) and enter the address to access the console login page: http://serverIP:serverPort.
For example:
If AMDC Console is deployed on the 192.168.0.1 server with default port 9001, the console login address is: http://192.168.0.1:9001.
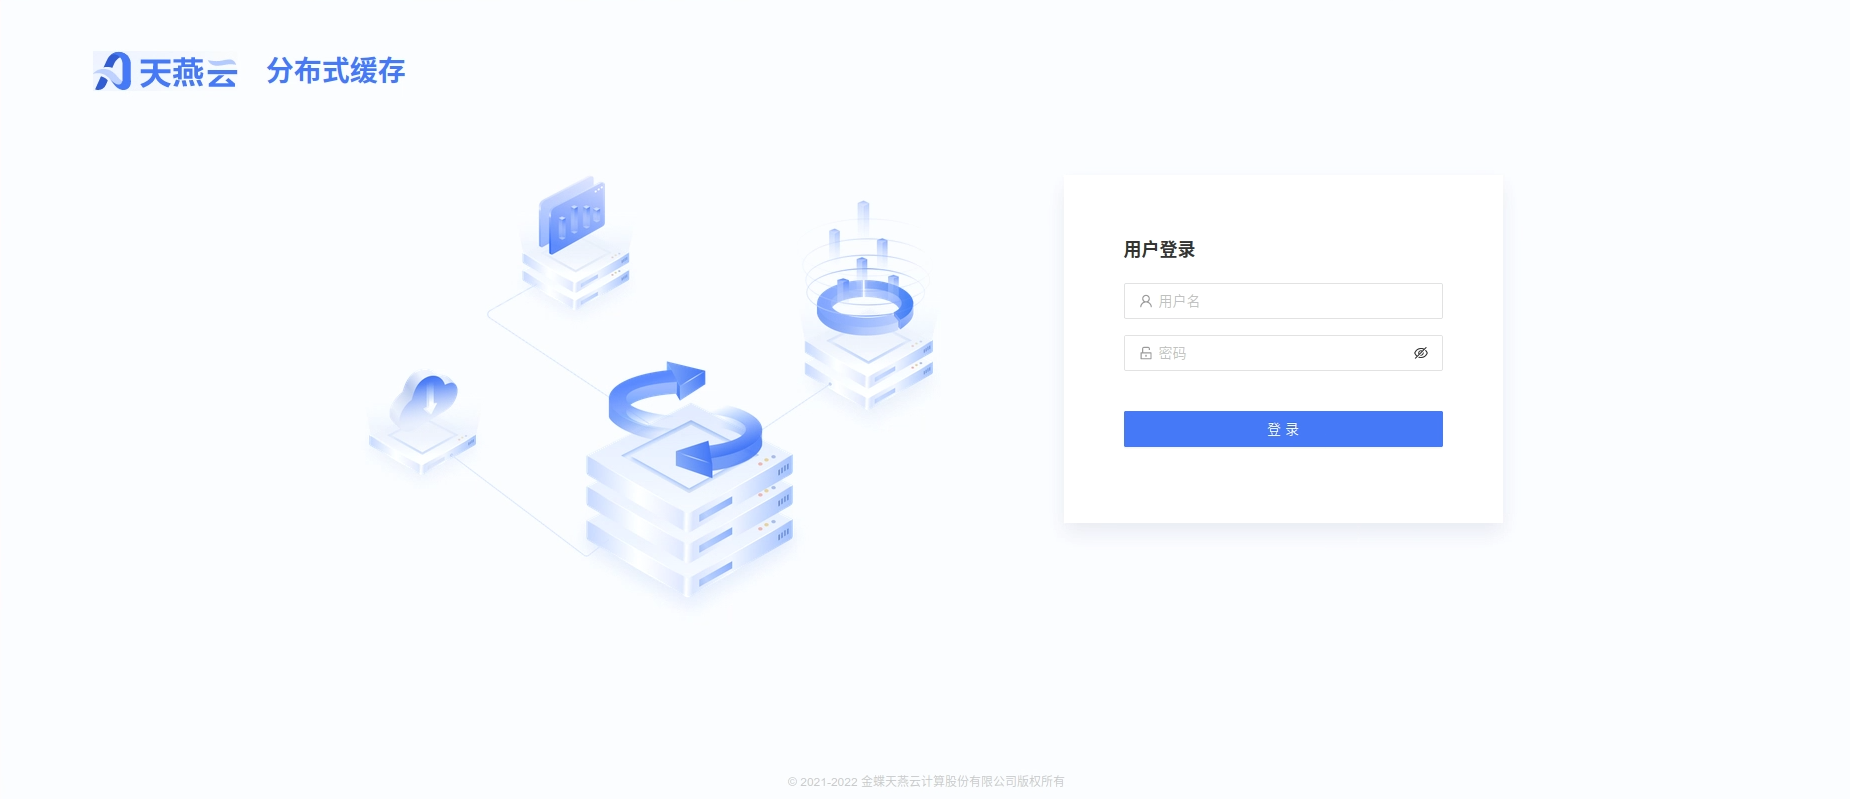
For initial username and password, refer to Chapter 8 "Password and Security".
# Personal Information
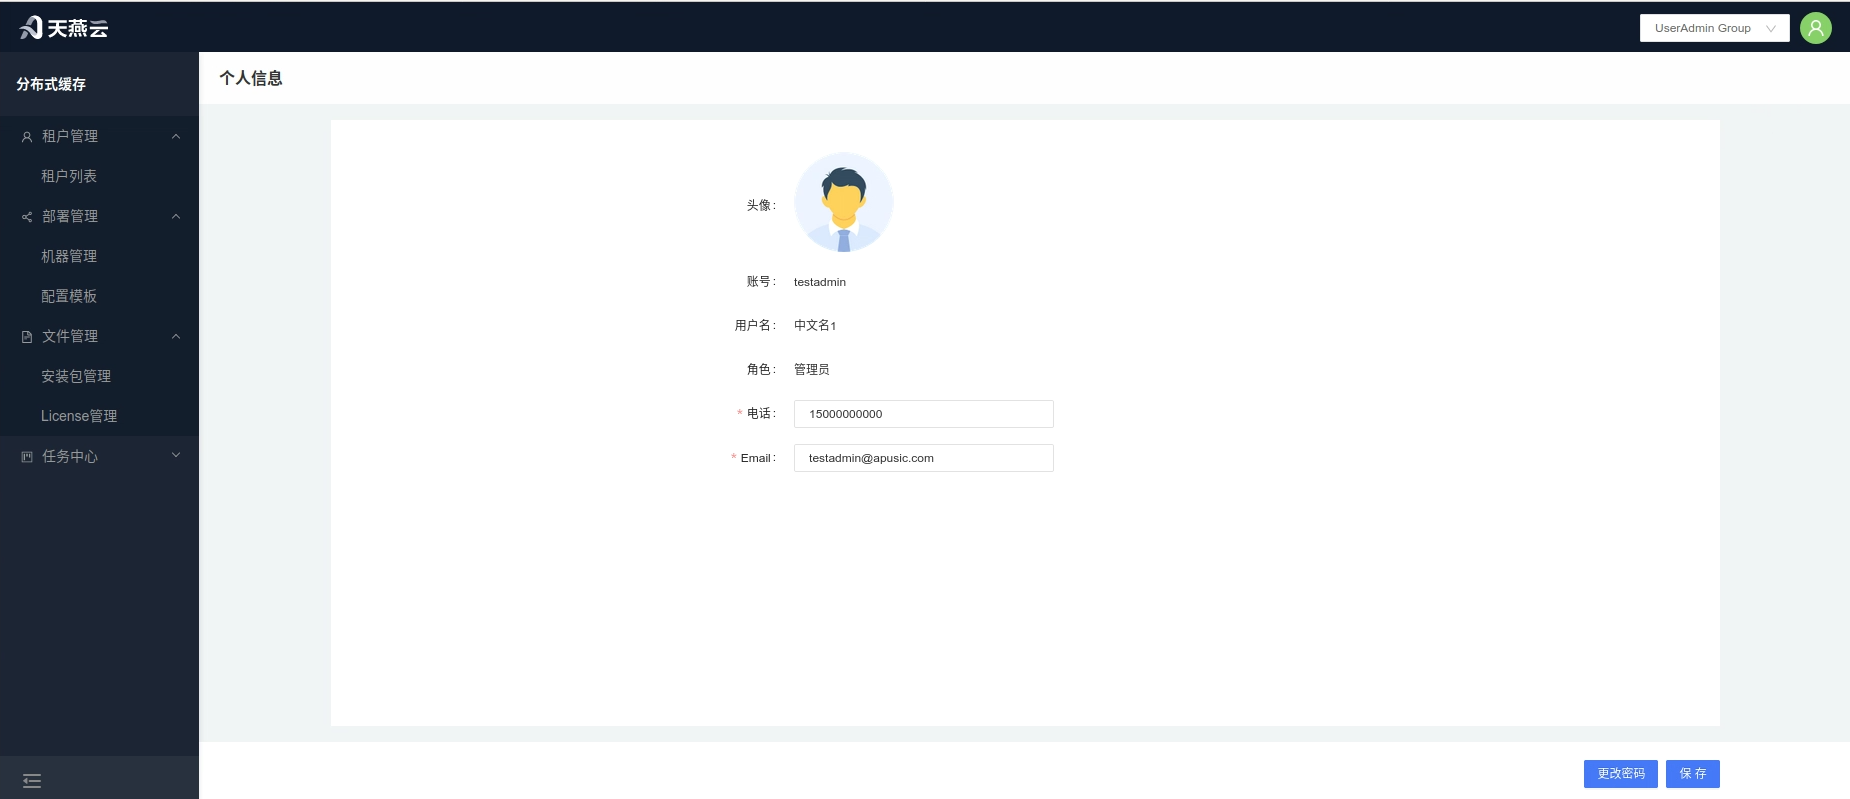
Click the avatar in the upper right corner of the homepage to enter the personal information page, where you can view user information or modify the current user's password, email, and phone. Avatar cannot be changed temporarily.
# Service Monitoring
Tenant Path: [Service Management] > [Service List]
Administrator Path: [Tenant Management] > [Tenant Details] > [Monitoring]
Click the [Monitoring] button under the cluster column to enter the cluster monitoring page, which will display detailed information and important indicator items of the current cluster.

# Analysis
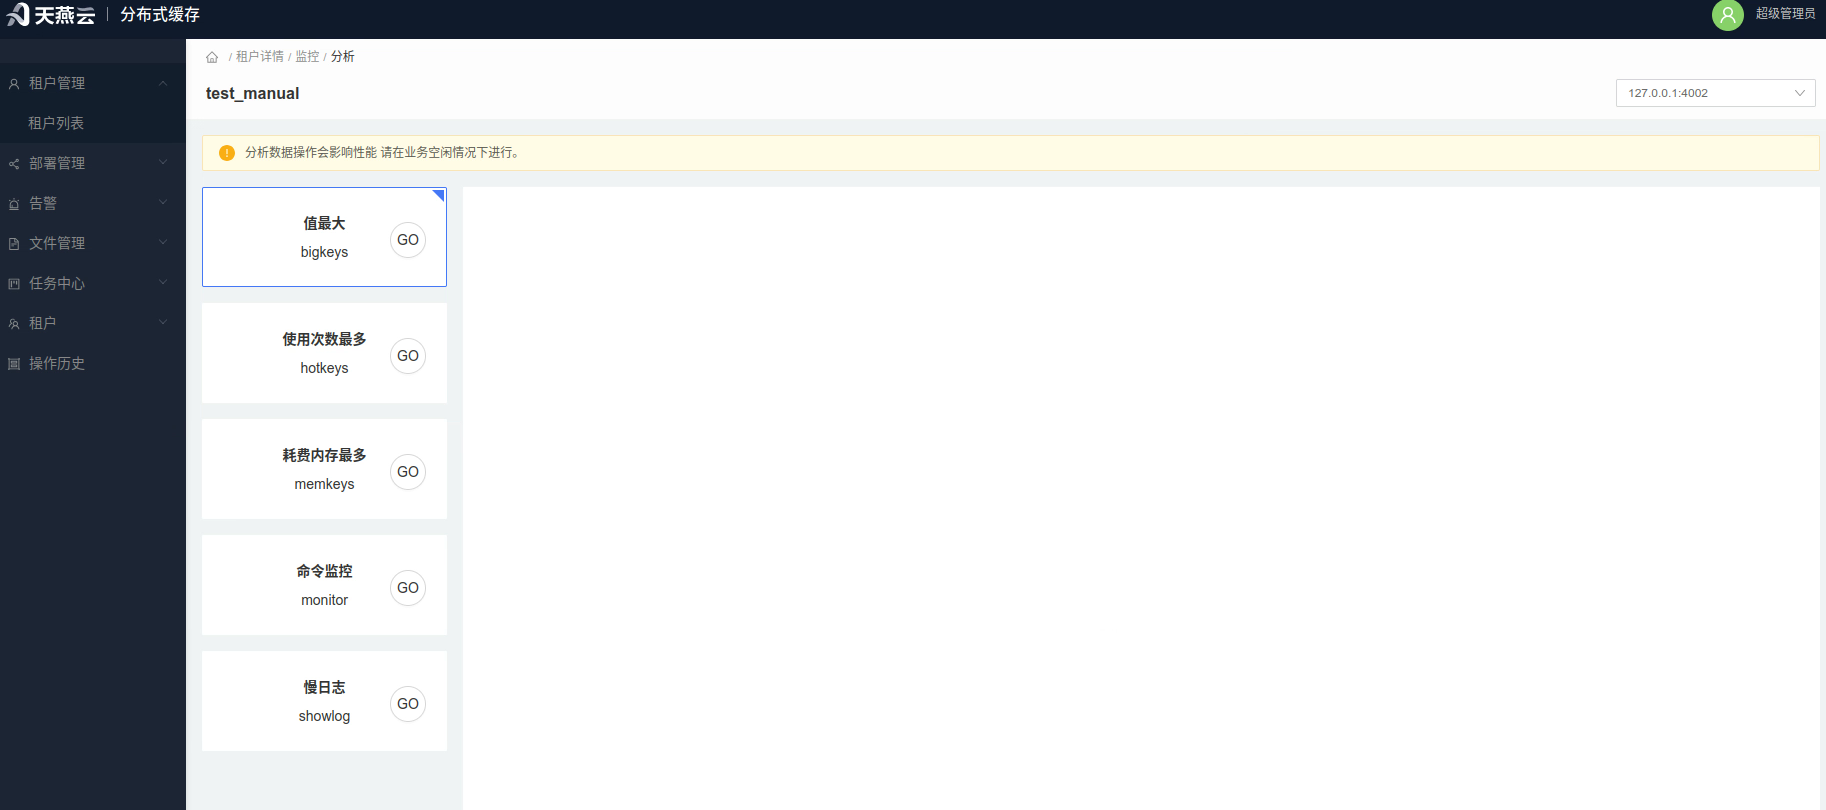
Click the [Analysis] button above [Monitoring] to enter the [Analysis] page, where you can perform data analysis queries for cache core bigkeys, hotkeys, memkeys, monitor, and slowlog.
# Administrator Functions
# Tenant List
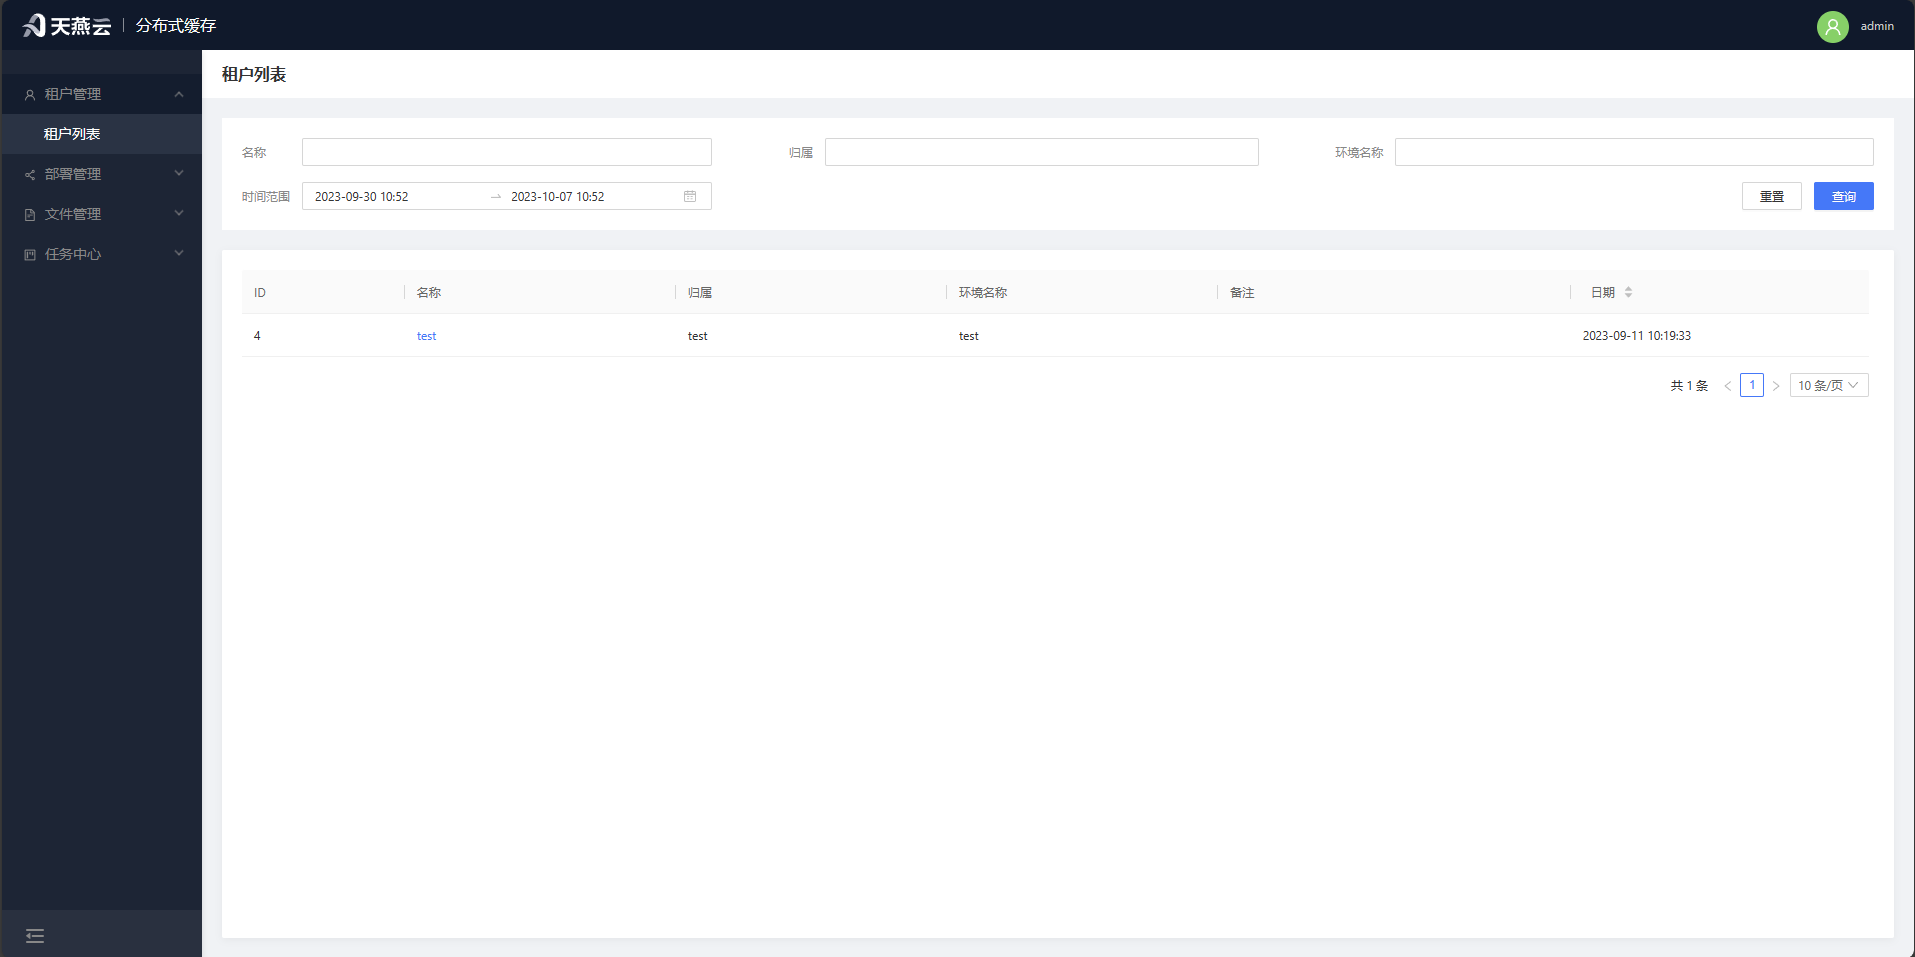
Page Path: Tenant Management - Tenant List
Displays all tenant information.
# Tenant Details
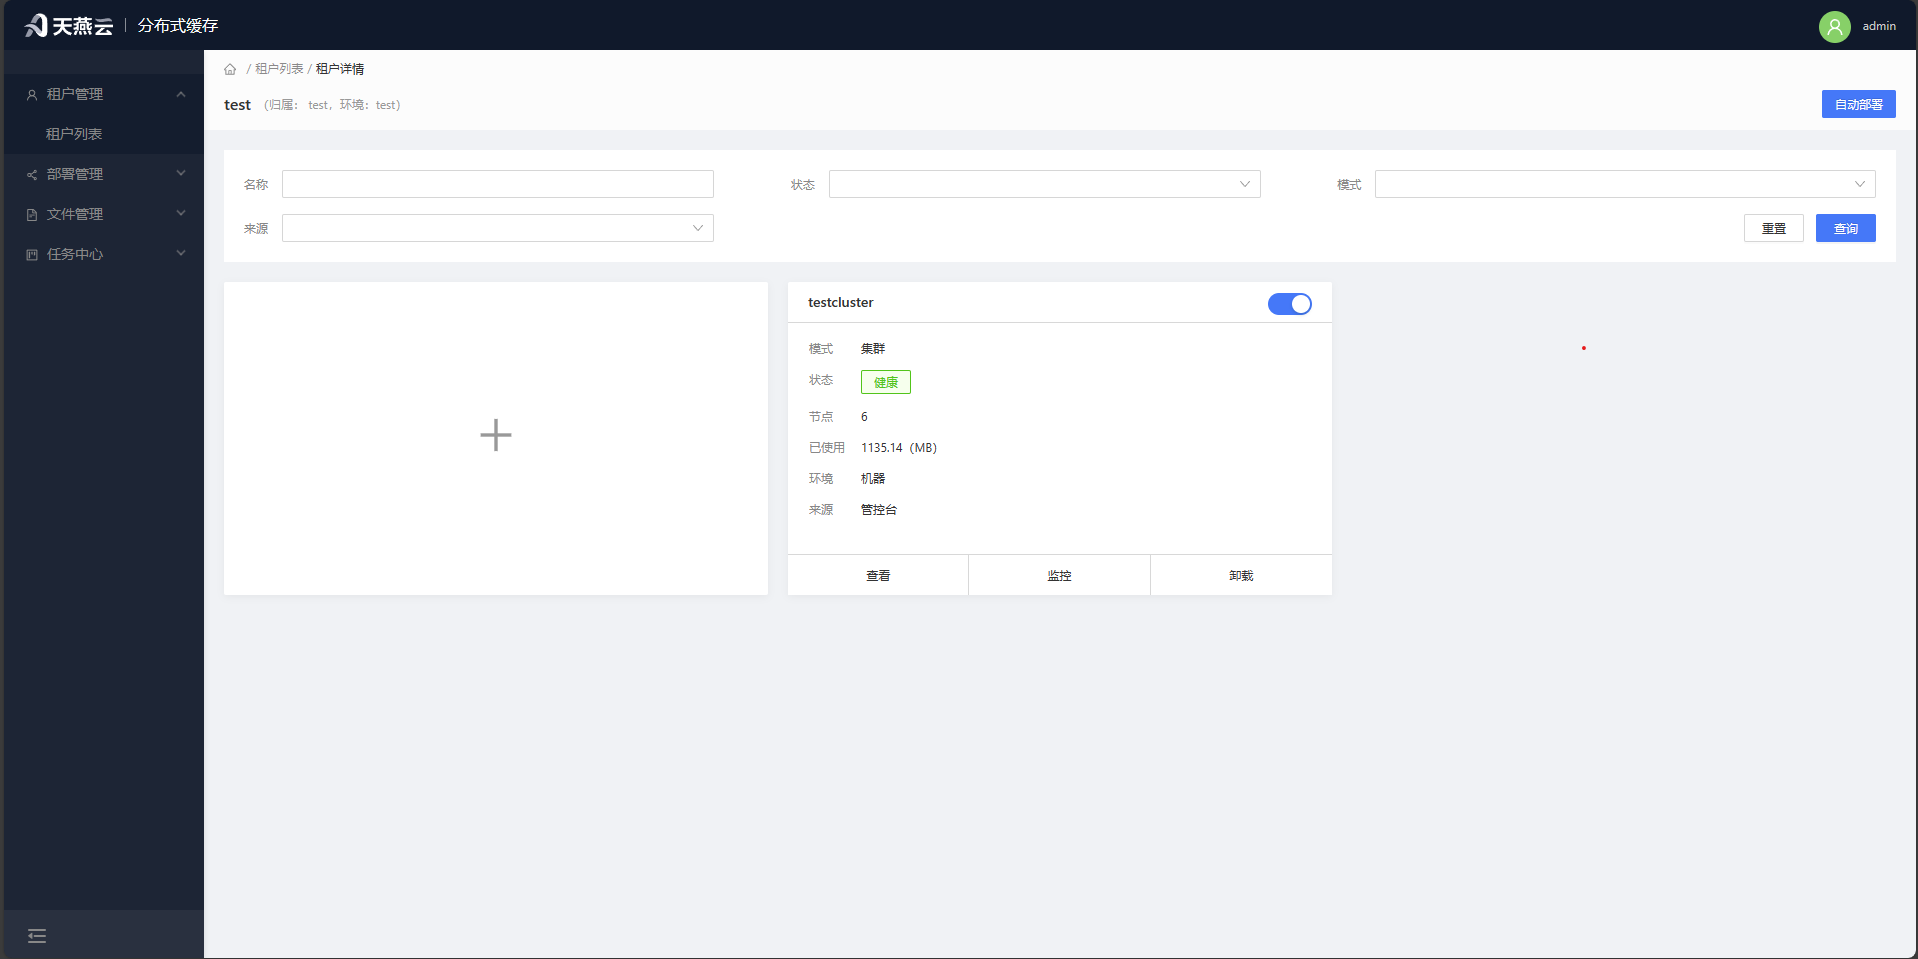
Page Path: Tenant Management - Tenant List - Tenant Details
Displays the list of cache cores owned by this tenant. Provides functions for automatic deployment of services for the tenant, importing existing clusters for the tenant, and enabling/disabling, setting, monitoring, and deleting cache cores.
# Import AMDC Cluster or Standalone
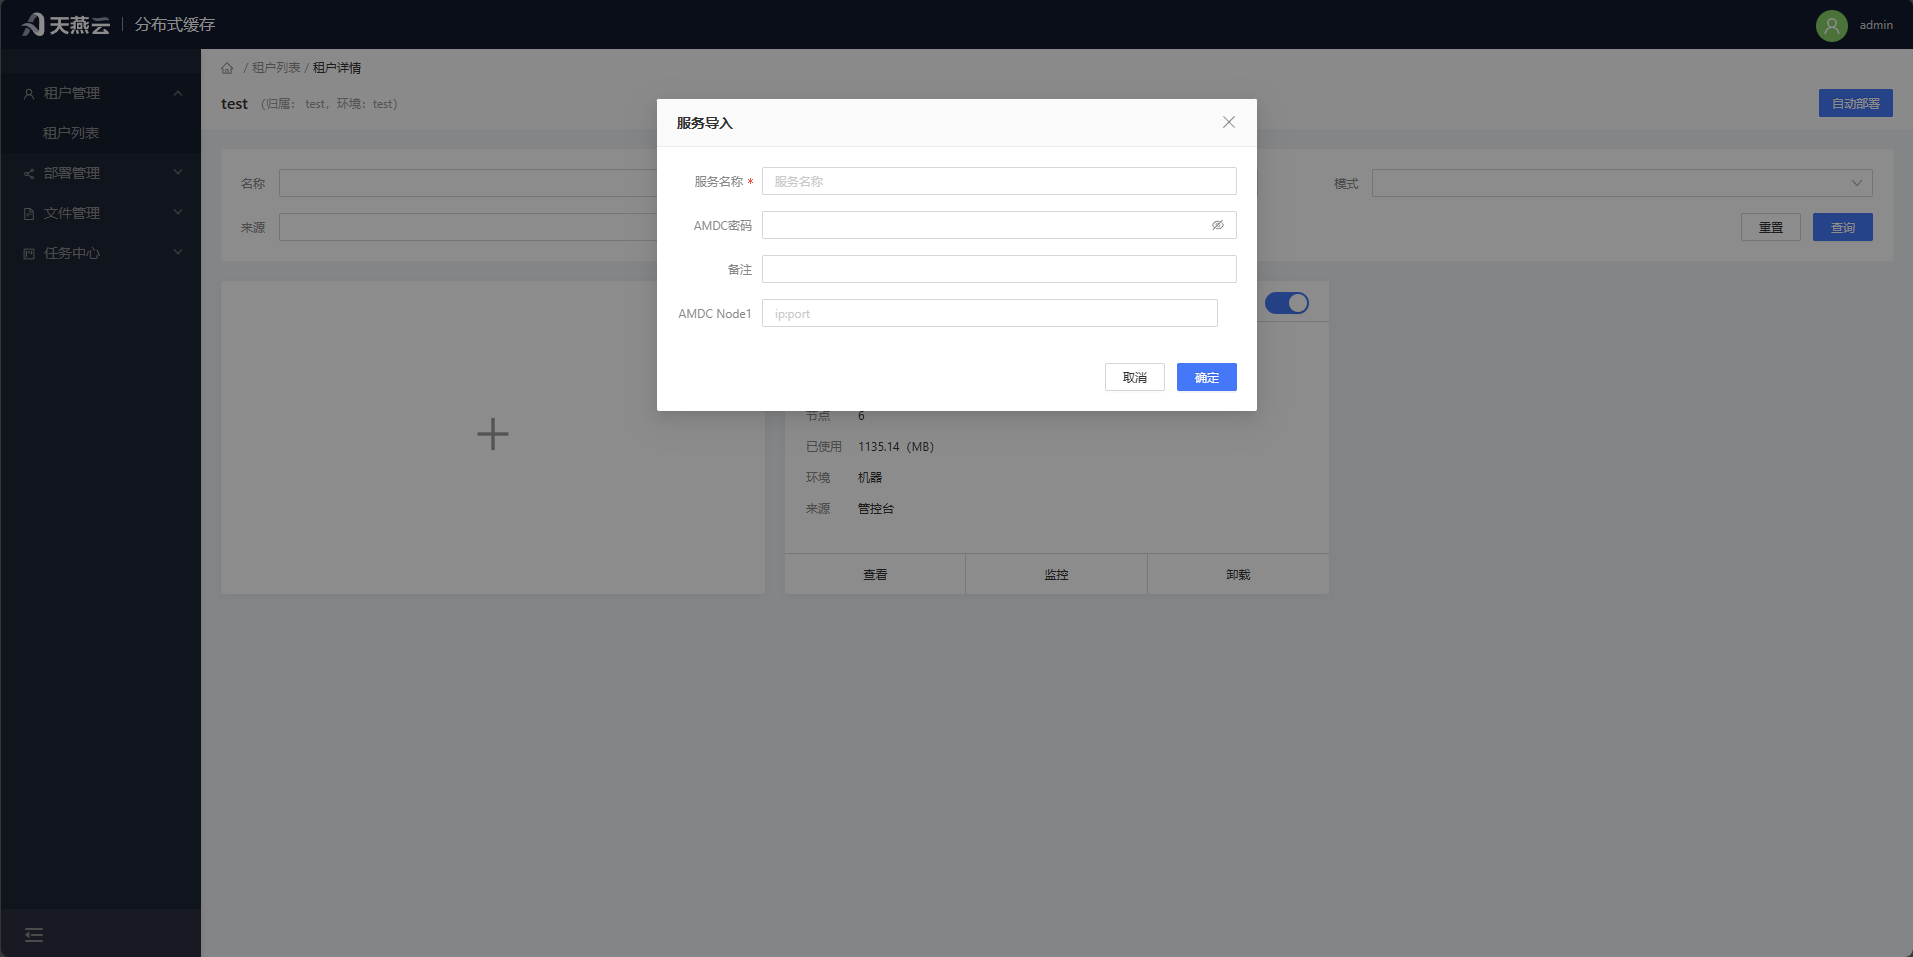
For AMDC cache cores not deployed through the console, they can be imported into the console for monitoring, modification, command execution, and other operations. Click the [+] import button on the cluster homepage to add monitored cluster/standalone instance information according to page prompts.
| Parameter | Description |
|---|---|
| Cluster Name | Custom cluster name |
| AMDC Password | Password for the AMDC cache core |
| AMDC Node | IP:Port of the AMDC cache core |
# Machine Management
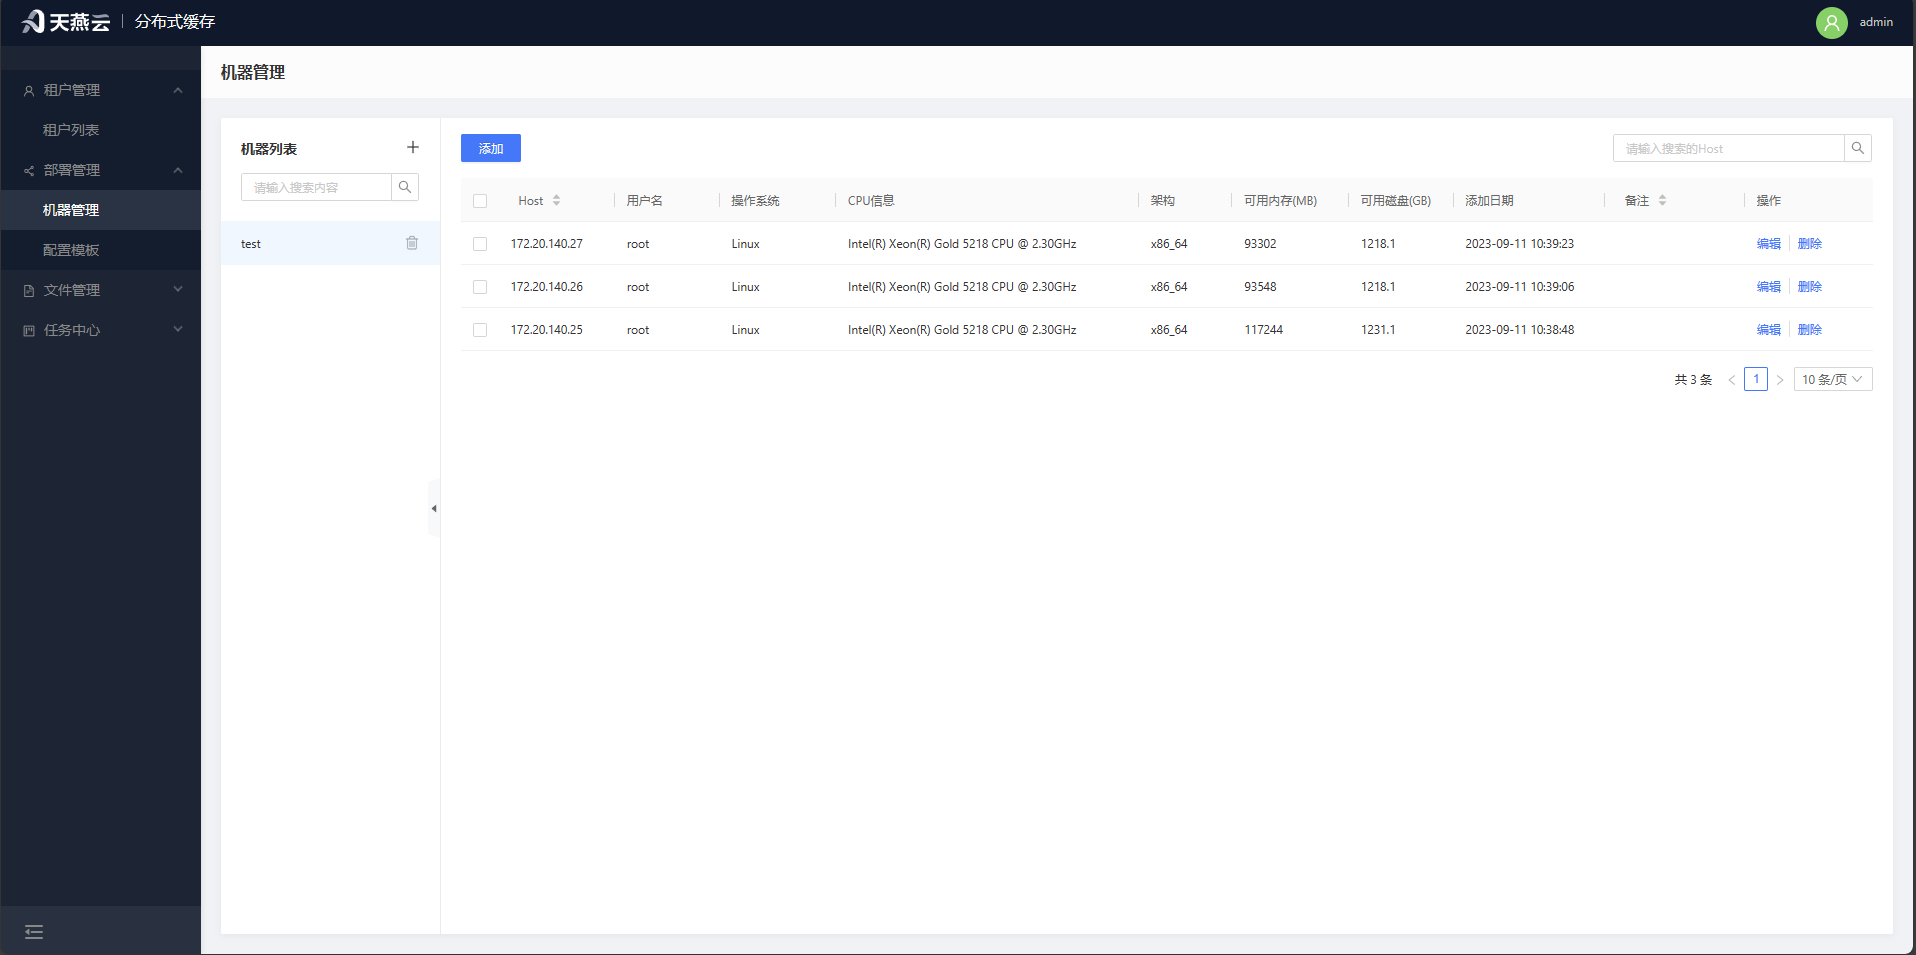
Enter [Deployment Management] > [Machine Management]. The machine management page provides entry points for adding and deleting machines. Machine information required for automatic deployment will be created here.
# Add Machine
Click [Deployment Management] > [Machine Management] on the homepage to enter the machine management page. A machine group must exist before adding machines. The same machine group can only add machines with the same chip architecture. Click the [+] button next to the machine group on the left to add a new machine group;
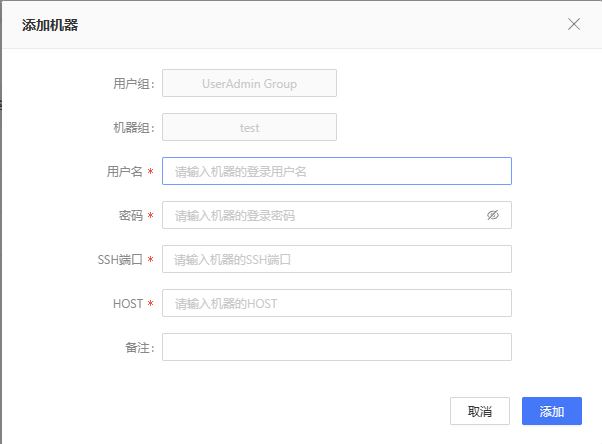
Select the machine group, click the [Add] button in the upper left, and enter the corresponding information in the input box to add a machine. Note: Only machines with normal connection status can be added, so please confirm the target machine connection status
| Parameter | Description |
|---|---|
| Username | Username for logging into the remote machine, e.g.: root |
| Password | Password for logging into the remote machine |
| SSH Port | Port for logging into the remote machine, e.g.: 22 |
| Host | Address of the remote machine, e.g.: 192.168.0.213 |
| Remark | Can be empty |

# Delete Machine
Click [Deployment - Machine Management] to enter the machine management page. Select the machine to delete, click the [Delete] button on the right side of the machine list to delete the current row machine. Batch deletion is supported.
# Edit Machine
Click [Deployment Management] > [Machine Management] to enter the machine management page. Select the machine to edit, click the [Edit] button on the right side of the machine list to edit the current row machine information.
# Configuration Template
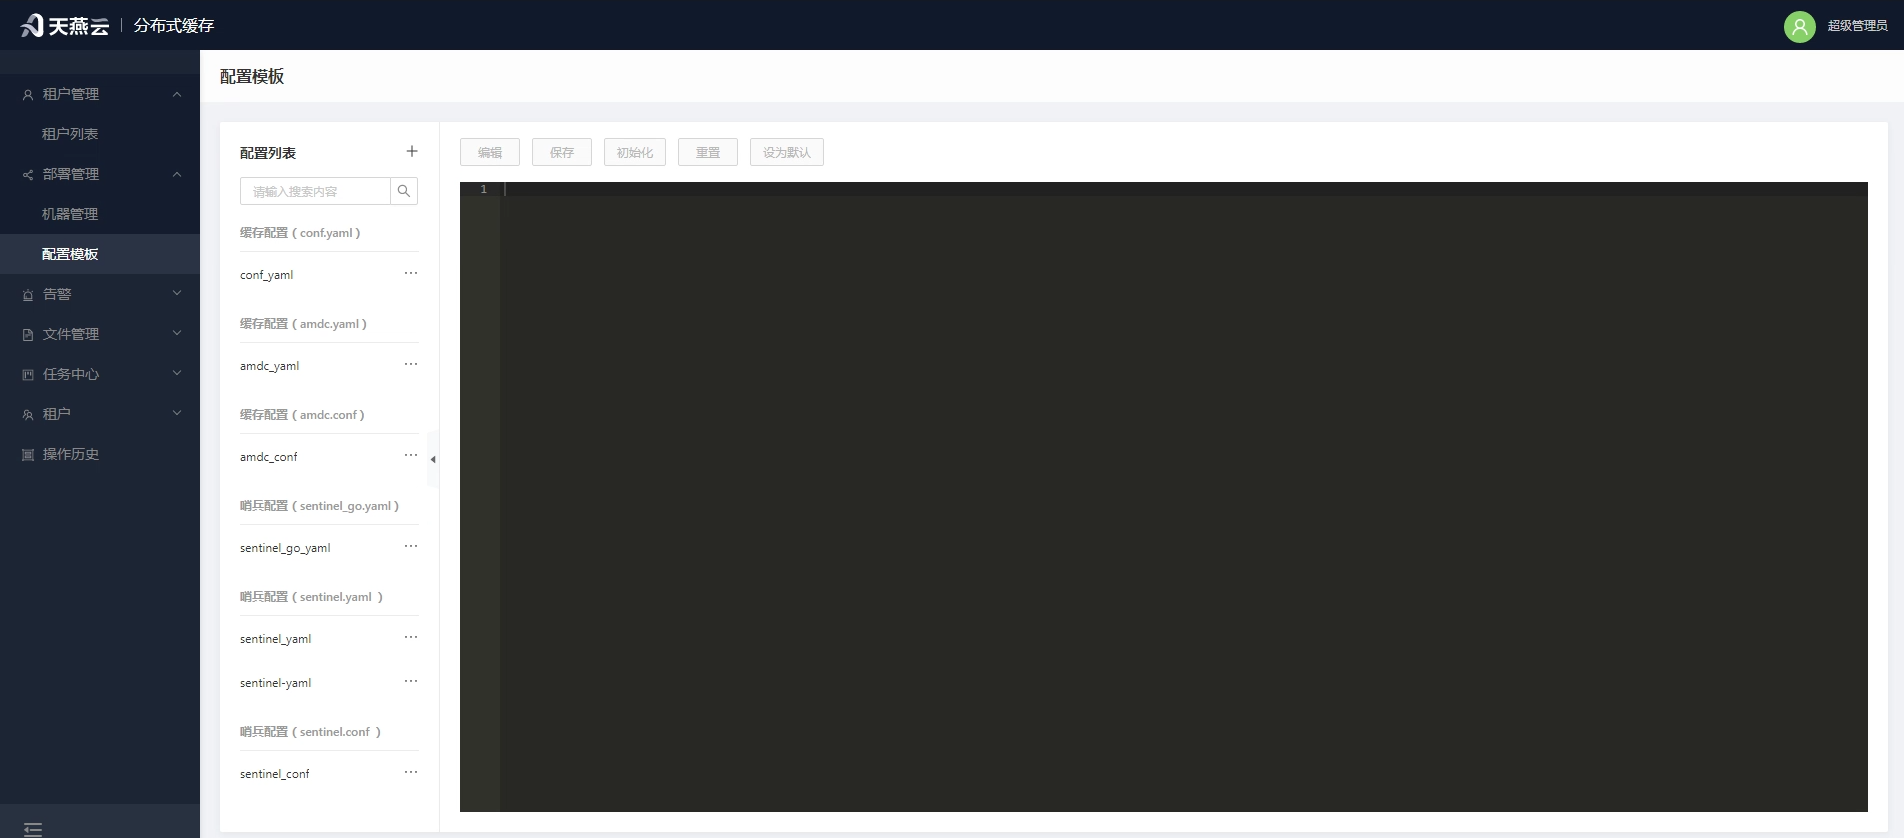
Click [Deployment Management] > [Configuration Template] to enter the configuration template page. On this page, you can define configuration templates for cache core and sentinel, and use these templates in [Automatic Deployment].
Note: Non-public parameters such as IP and port will not take effect in the configuration template to ensure automatic deployment works properly.
# Files
File management is used to store AMDC installation packages and License files. Uploaded files will be preliminarily verified by the console to determine their availability and selected for use during automatic deployment.
# Installation Package Management
Installation package management is used to upload installation packages for automatic deployment.
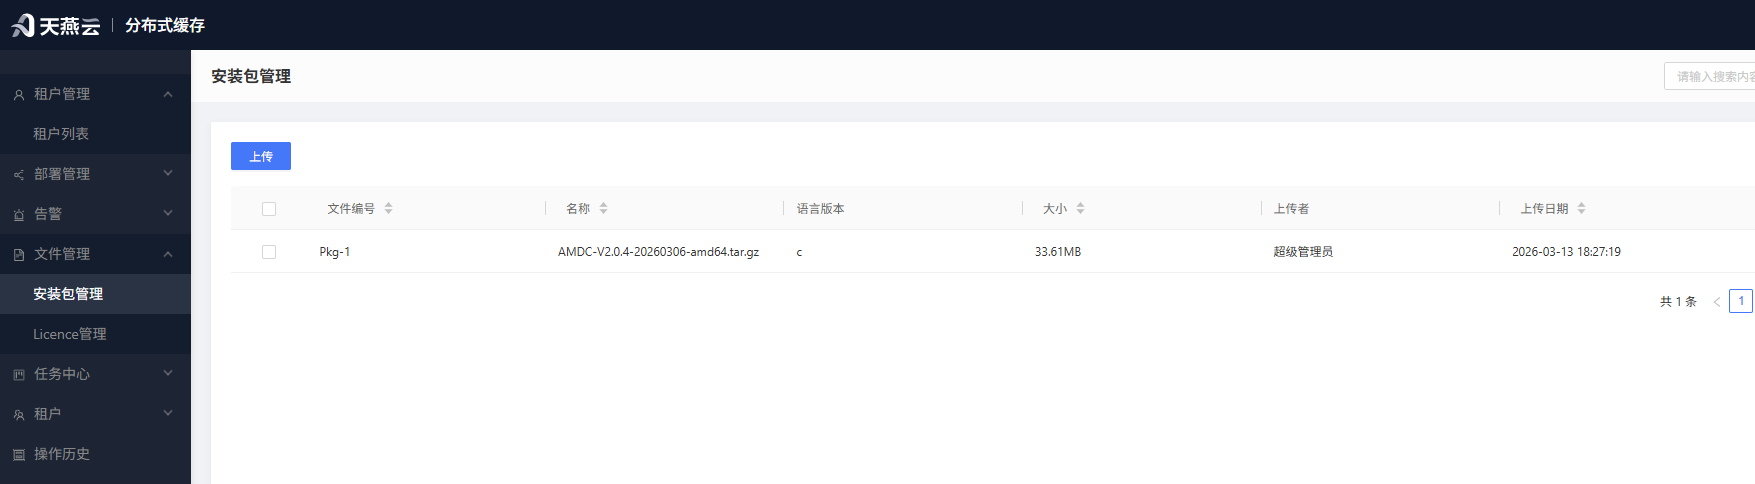
Upload Installation Package
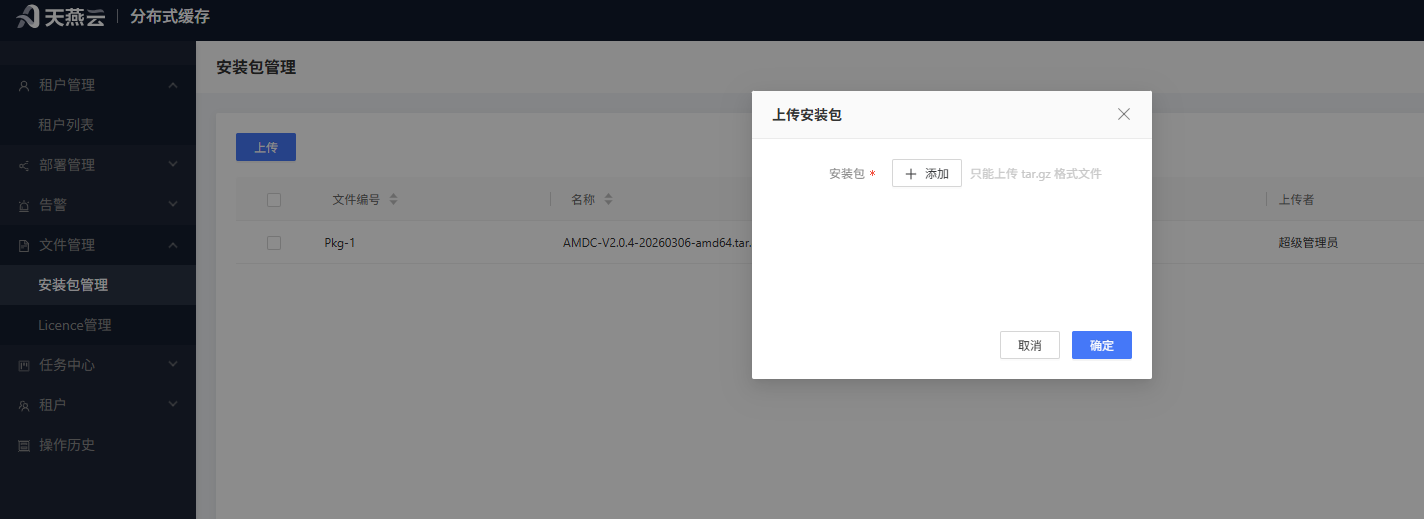
Click the [Upload] button to open the upload installation package popup. Click [Choose File] to select the installation package to upload, then click confirm.
Only one installation package can be uploaded at a time. You can specify the installation package type (c or go).
Delete Installation Package
Select the installation package to delete and click the [Delete] button in the upper left corner. Multiple packages can be deleted simultaneously.
# License Management
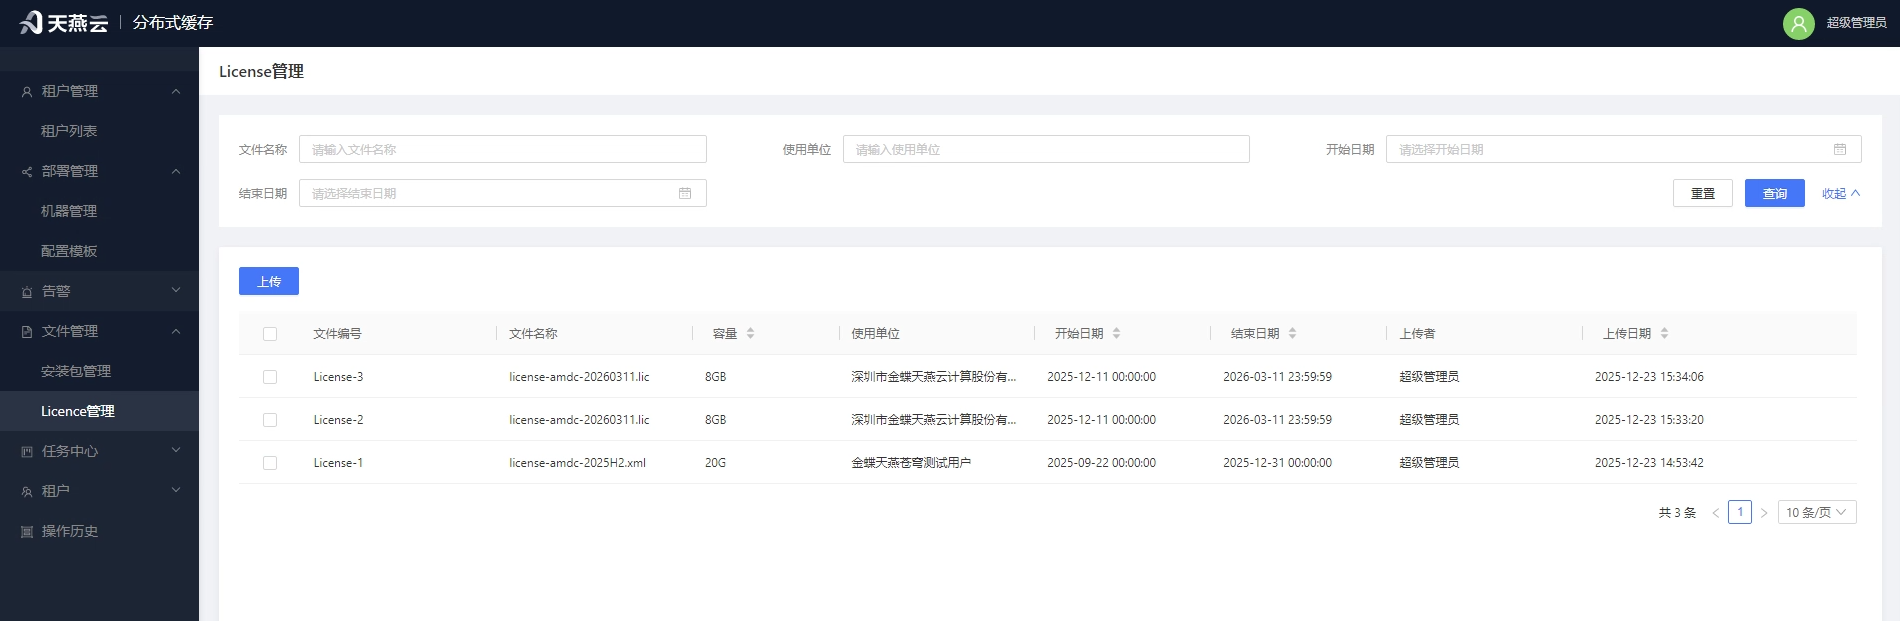
Manage licenses for automatic deployment upload. After upload, licenses will be parsed, and invalid licenses cannot be saved in the console.
Upload License
Click the [Upload] button to open the upload license popup. Click [Choose File] to select the installation package to upload, then click confirm. Multiple licenses can be uploaded simultaneously.
Delete License
Select the installation package to delete and click the [Delete] button in the upper left corner. Multiple licenses can be deleted simultaneously.
# Automatic Deployment
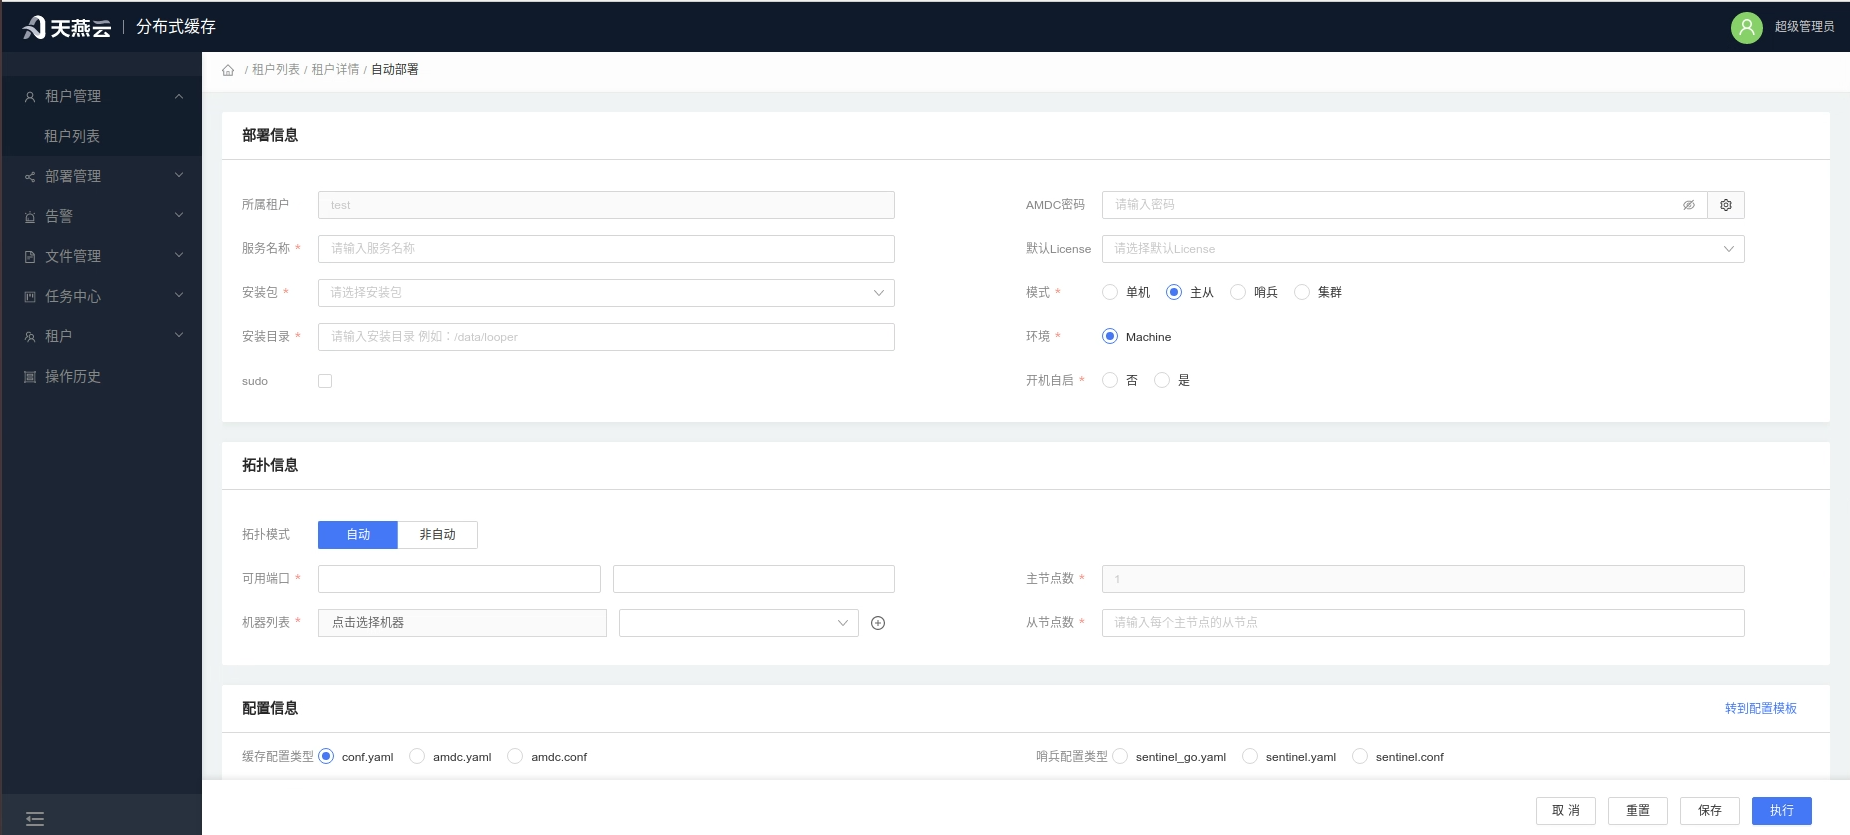
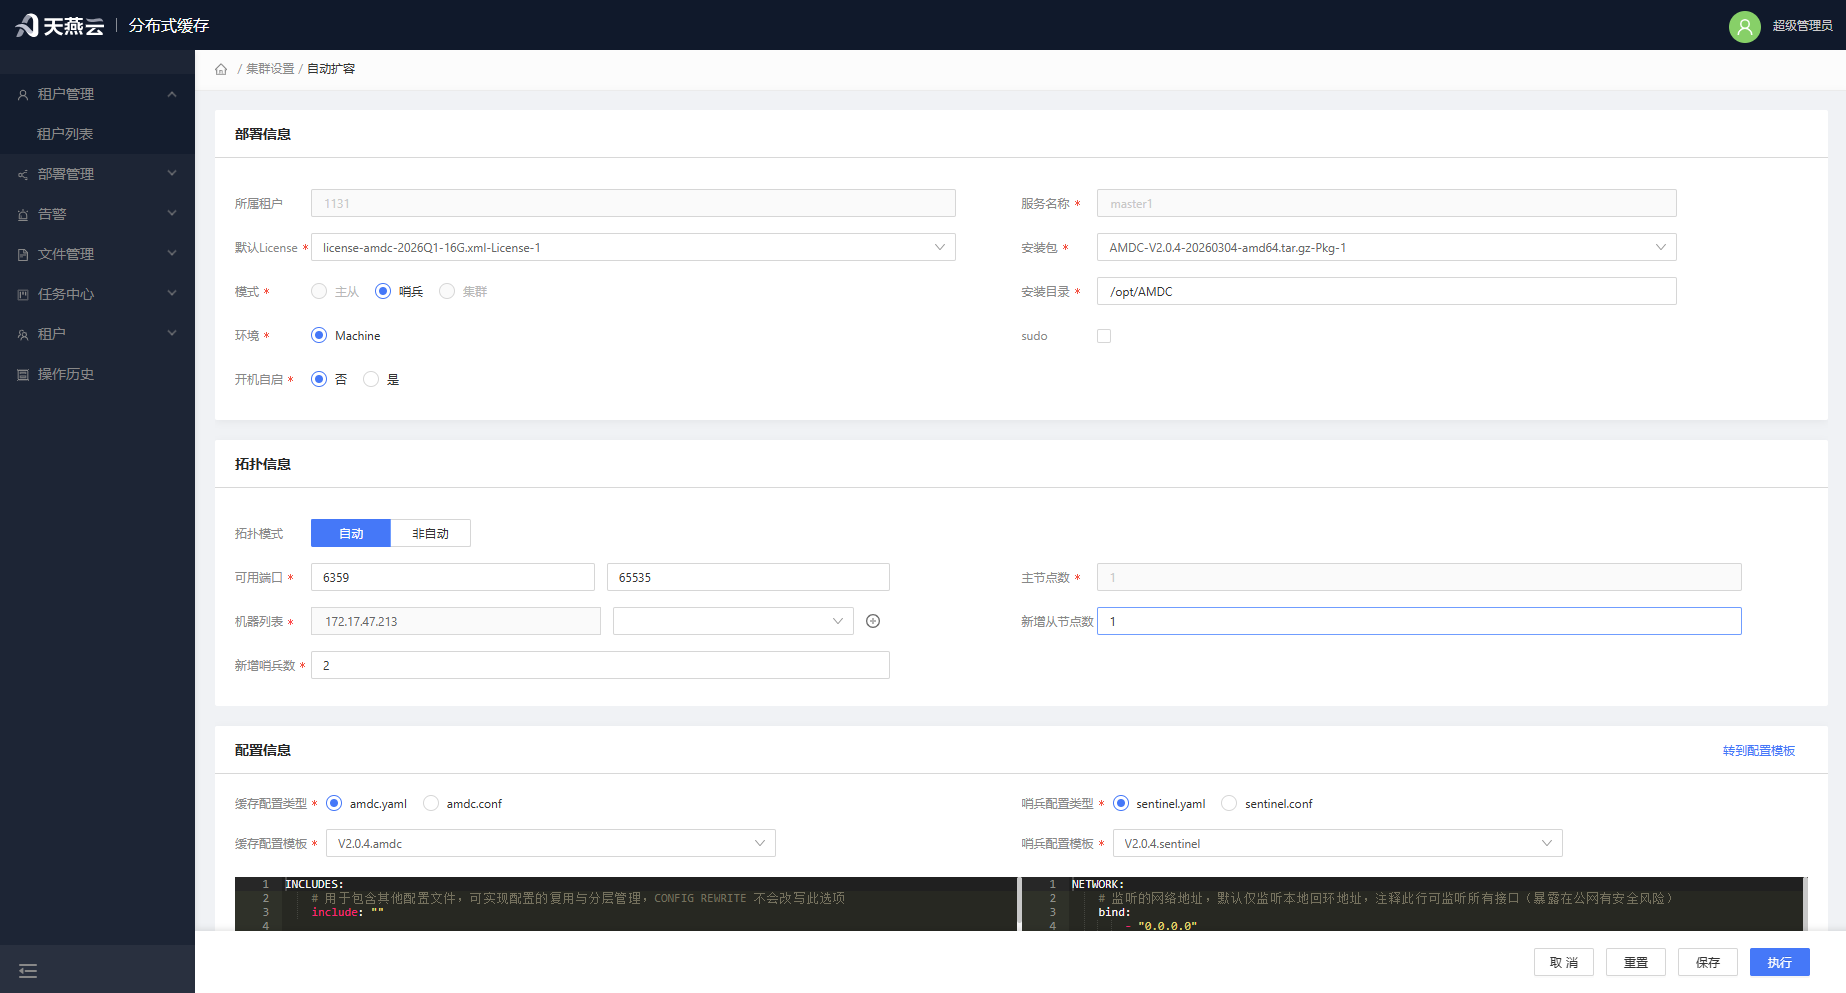
Enter [Tenant List] > [Tenant Management] > [Tenant Details], click [Automatic Deployment] to enter the [Automatic Deployment] form page.
Fill in the corresponding deployment information and click [Save Task] to save the deployment information to [Task Center] > [Deployment Tasks]. At this point, the deployment task has not started; click [Execute Task] to save the deployment information to [Task Center] > [Deployment Tasks] and start deployment at the same time. Deployment progress and status can be viewed in [Deployment Tasks].
Prerequisites: Machine addition, license upload, and installation package upload must be completed.
Page Parameters:
| Parameter | Description |
|---|---|
| Cluster Name | Custom cluster name |
| AMDC Password | Password for AMDC cache core |
| Mode | Standalone mode, Master-Slave mode. Select standalone when deploying cluster mode |
| Environment | Default Machine |
| Installation Package | Select the added installation package (see Installation Package Management) |
| License | Select the added License (see License Management) |
| Machine List | Select added machines (see Machine Management) |
| Startup Port | Port where AMDC cache core starts. Multiple instances will be deployed with current port + 1 |
| Installation Directory | Installation path for AMDC cache core. When installing with sudo, need to install under home / directory |
| sudo | Whether to install with sudo |
| Auto Topology | Auto topology means automatic planning of master-slave distribution on machines, otherwise need to specify manually |
Note: Using automatic deployment function requires target server to have tar and ss commands.
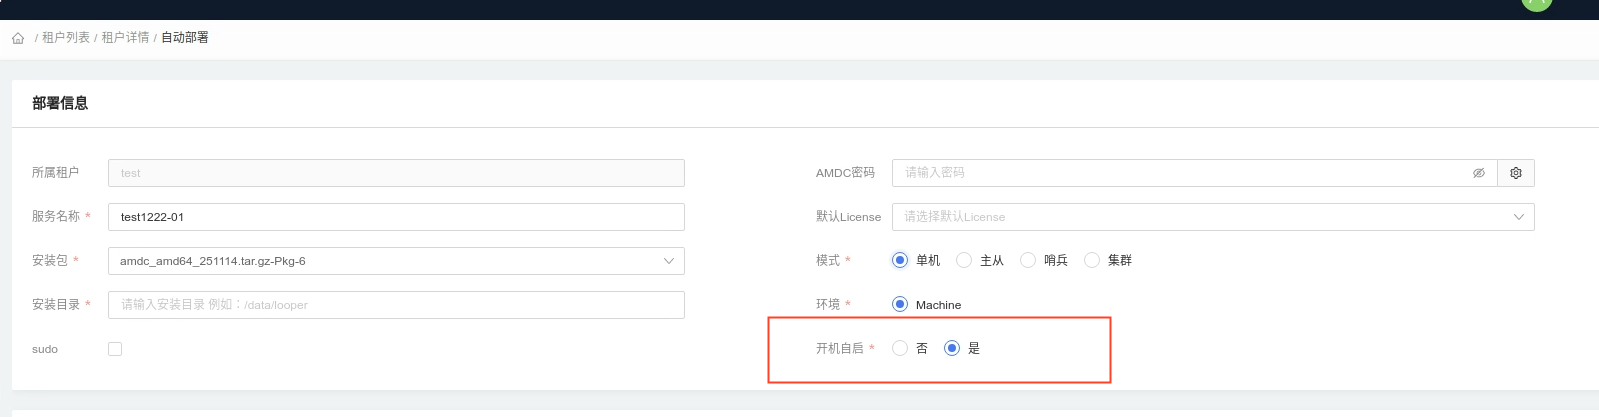
Service auto-start on boot can be enabled through the auto-start option after deployment is complete
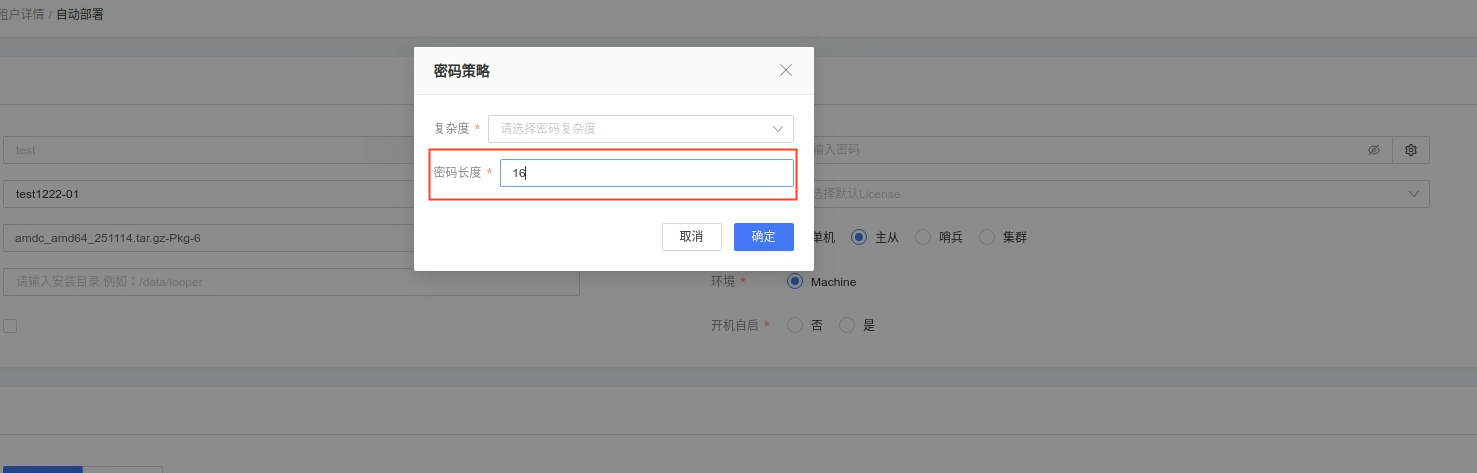
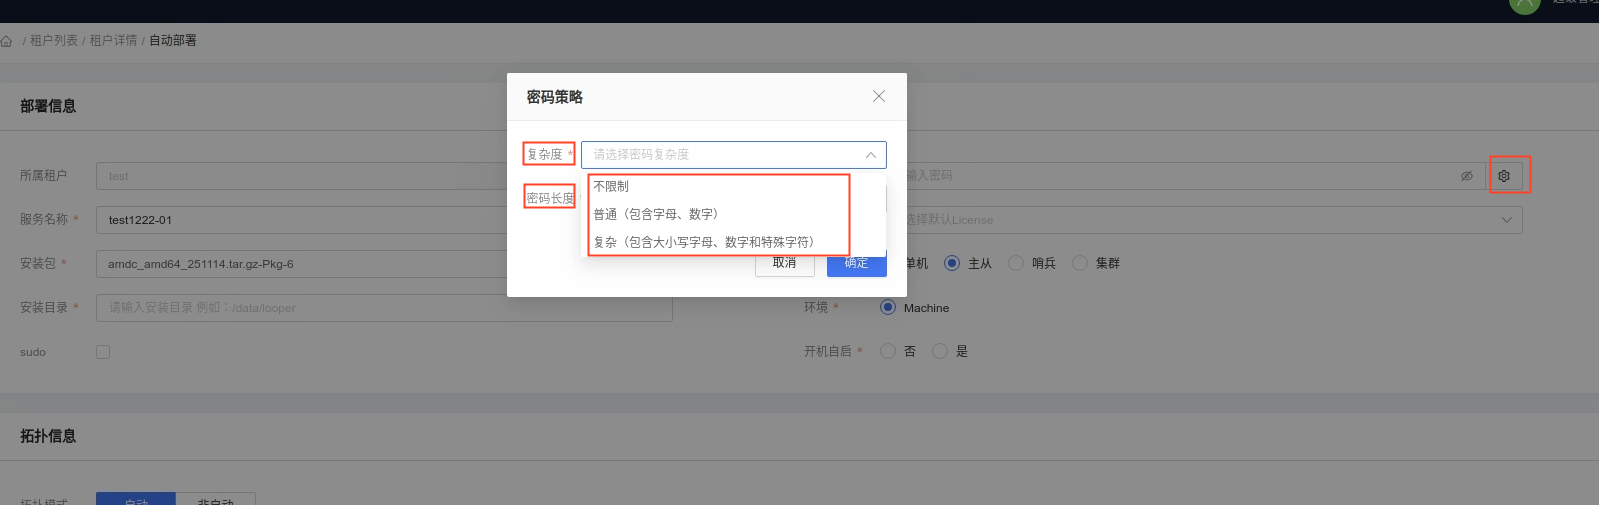
Click the settings after the password to enter the password format requirement settings interface for password complexity and length settings
# Automatic Deployment Standalone Mode
Before console automatic deployment, please ensure the target server connection is normal, the target server has been added to the machine list (refer to Machine Management), and the target server has tar and ss commands.
Operation Steps:
- Select [Standalone] for mode. In standalone mode, master node defaults to 1 and slave node defaults to 0. Enter corresponding information according to the automatic deployment interface prompts, click the [Install] button for one-click deployment.
Verify automatic deployment result: Click the [Service List] menu to check if the cluster is generated and the status is healthy. You can use [Command Line] for further verification.
# Automatic Deployment Master-Slave Mode
Before console automatic deployment of master-slave mode, please ensure the target server connection is normal, and the target server has been added to the machine list (refer to Machine Management).
Operation Steps:
- Select AMDC core installation package and license according to page content, select machine according to target server, select master-slave in [Mode], master node defaults to 1, click install to automatically achieve master-slave deployment.
# Automatic Deployment Sentinel Mode
Before console automatic deployment of sentinel mode, please ensure the target server connection is normal, and the target server has been added to the machine list (refer to Machine Management).
Operation Steps:
- Select AMDC core installation package and license according to page content, select machine according to target server, select master-slave in [Mode], master node defaults to 1, click install to automatically achieve master-slave deployment.
# Automatic Deployment Cluster Mode
Before console automatic deployment of master-slave mode, please ensure the target server connection is normal, and the target server has been added to the machine list (refer to Machine Management).
Operation Steps:
- Select AMDC core installation package and license according to page content, select machine according to target server, select cluster in [Mode], click install to automatically achieve master-slave deployment.
# Deployment Tasks
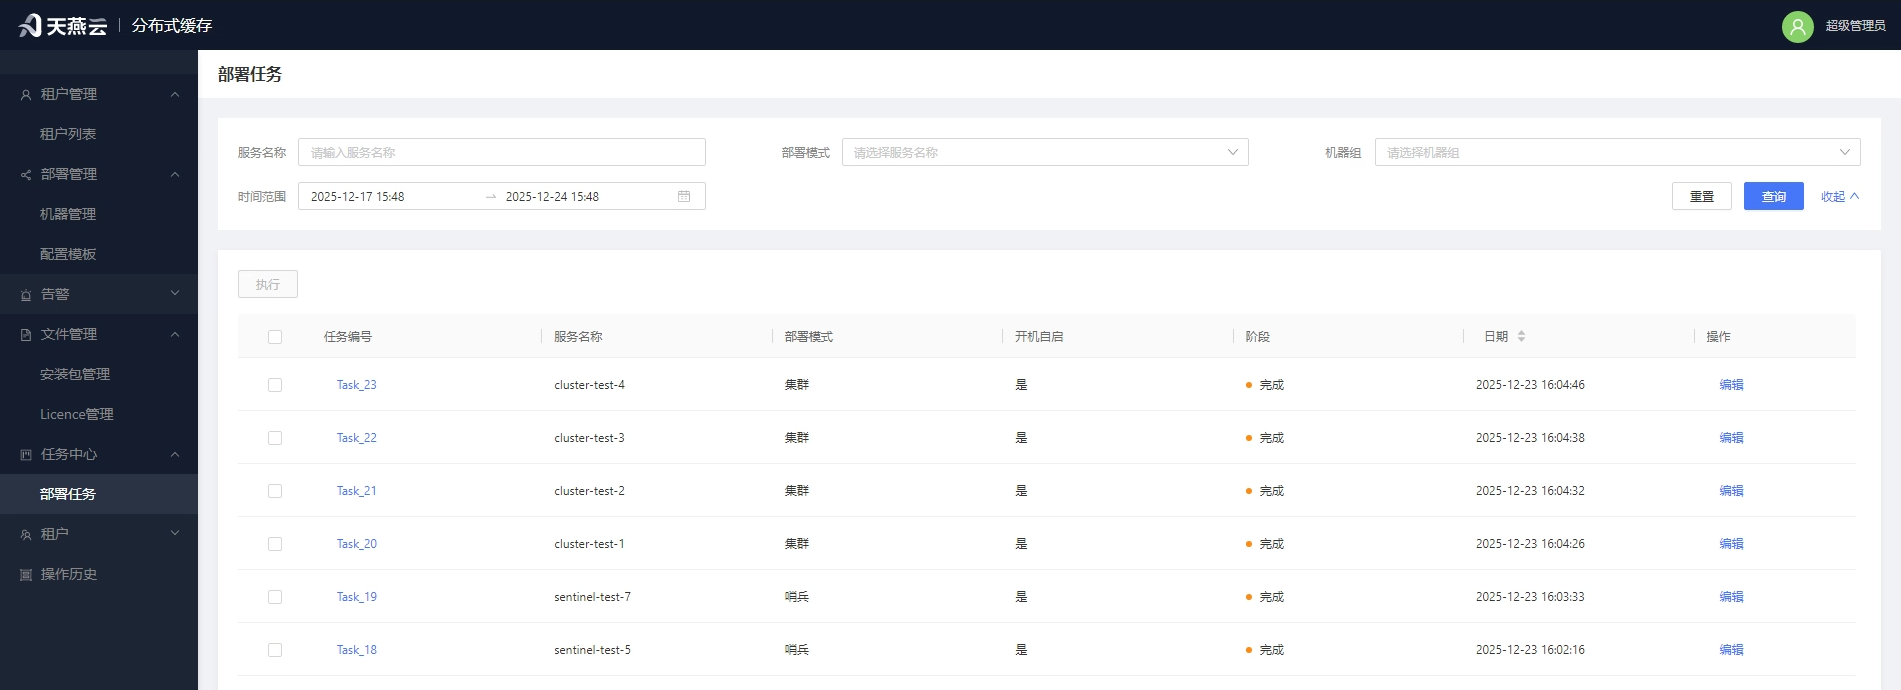
Enter [Task Center] - [Deployment Tasks]. This displays the list of all tasks. You can view deployment status through the task list fields; if the task is in Not Executed status, you can modify deployment information through [Edit]; if deployment fails, you can view the specific reason by clicking the [Task Details] button in the operation column.
# Settings
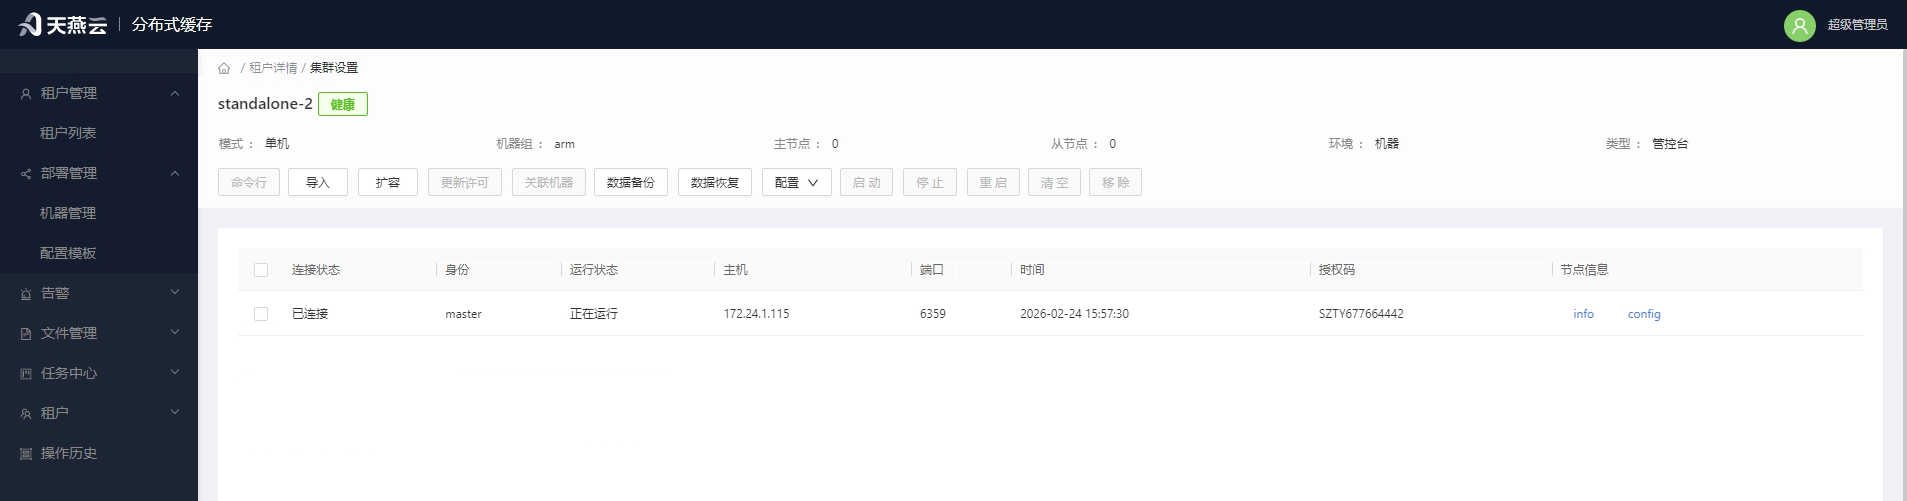
Provides AMDC service command line, configuration modification, cluster node stop/start/restart, info/config information viewing, machine association, data backup, and data recovery operations.
# Command Line
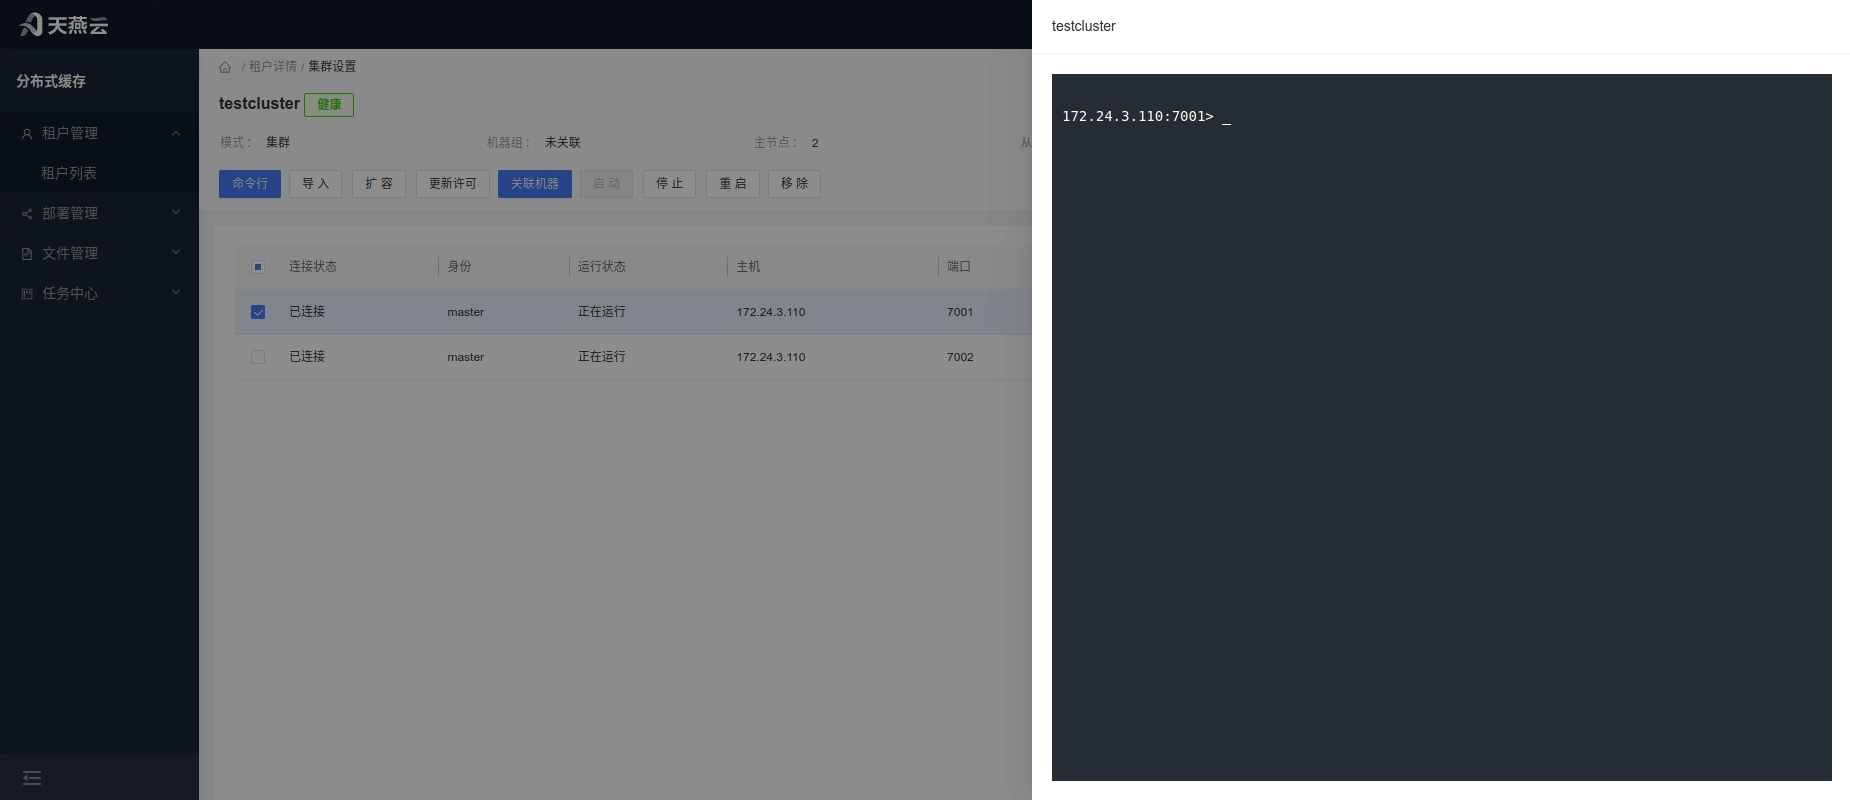
Enter [Service List] and click the [Command Line] button in the service or click [Settings] to enter the service settings interface, then click the [Command Line] button.
# Import
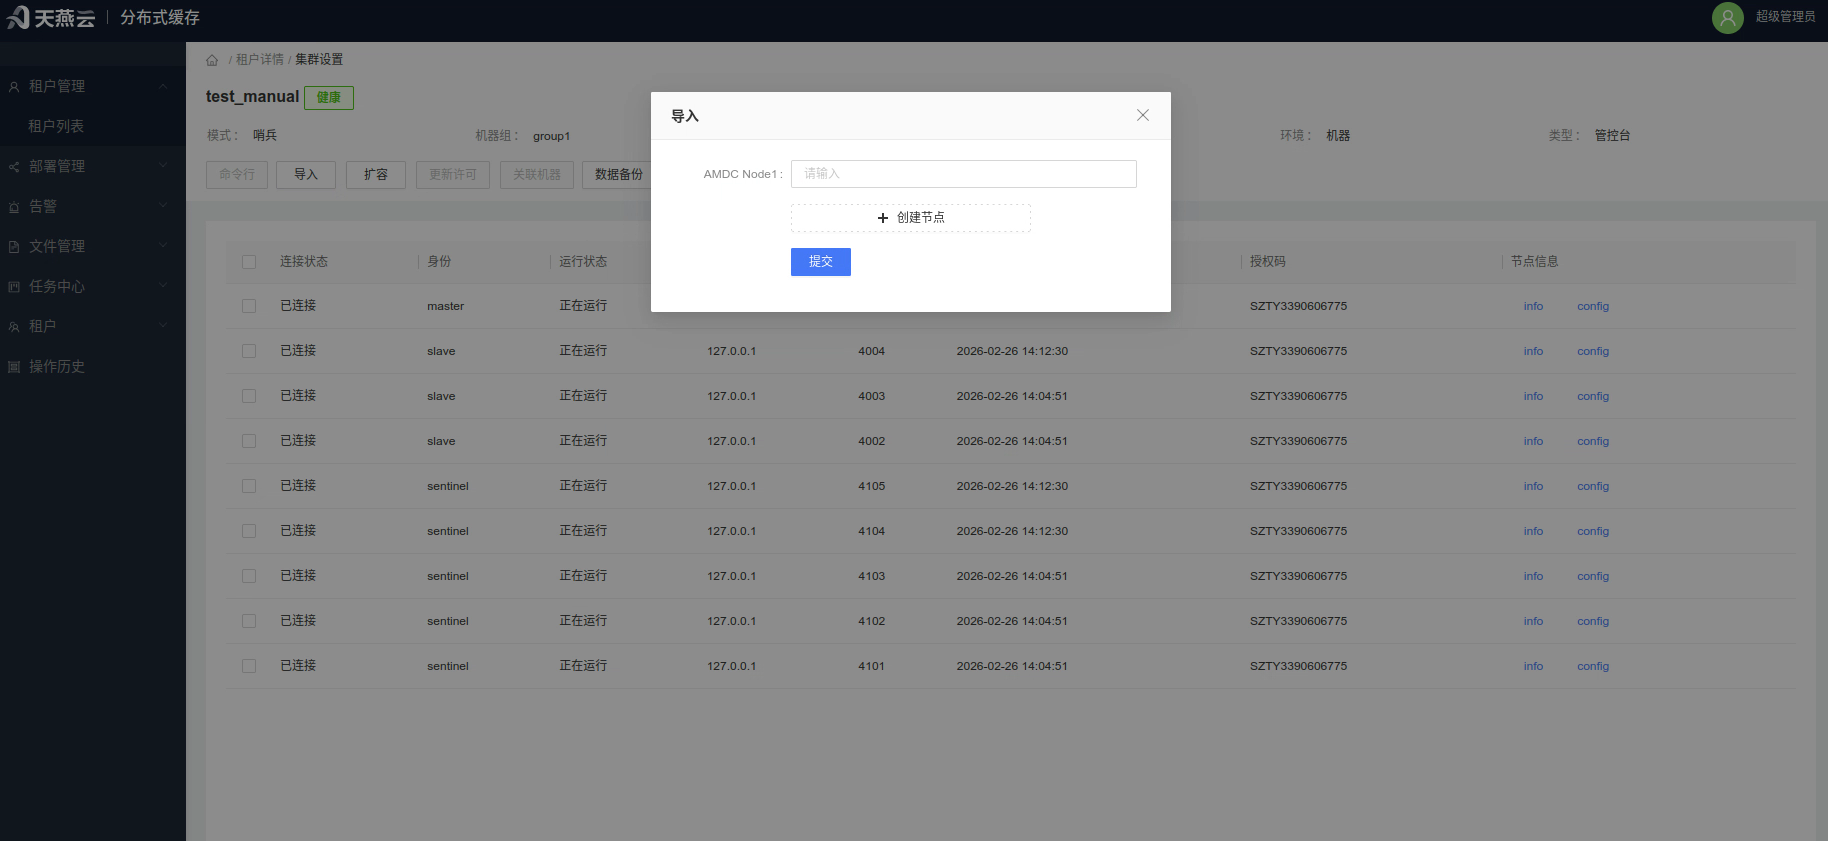
Add nodes belonging to the cluster. You can import AMDC cache cores created through other channels via the console.
Operation steps: Click the [Import] button to enter the cluster node import page and import AMDC services created outside the console.
Note: Only services that already belong to the current cluster can be imported.
# Automatic Scaling
Click the [Scale] button to jump to the automatic scaling page, enabling expansion of slave nodes in master-slave mode or expansion of cluster mode nodes.
# Update License
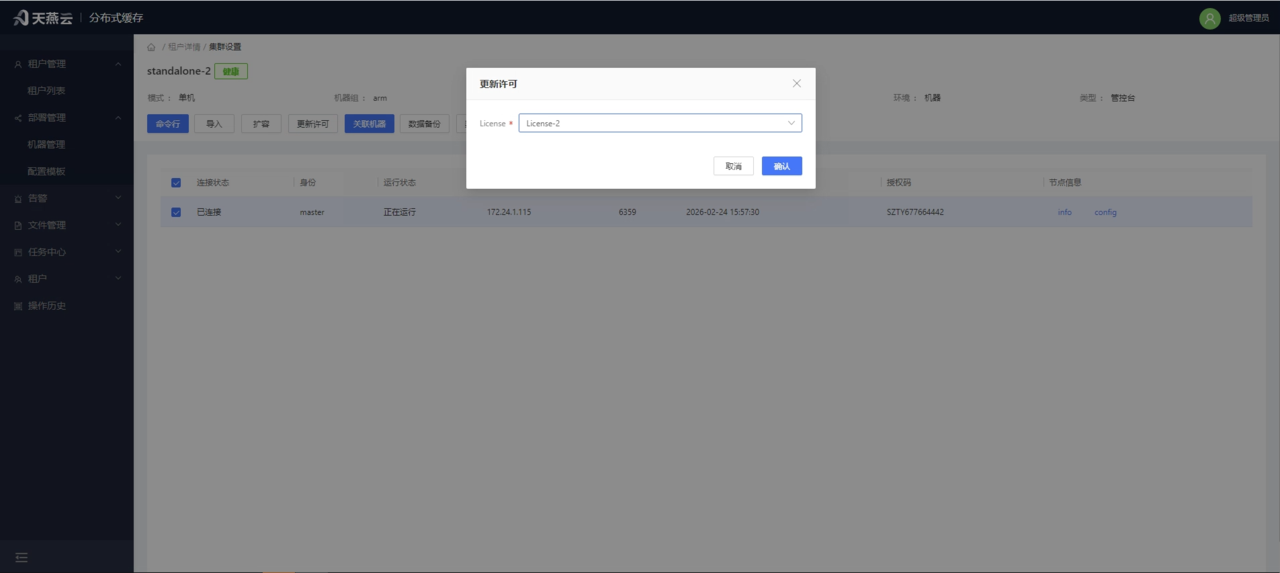
Click the [Update License] button to open the update license popup. Select the uploaded license and click [Confirm] to update. When the license is within 1 month of expiration, a reminder will appear in the [Service List].
# Associate Machine
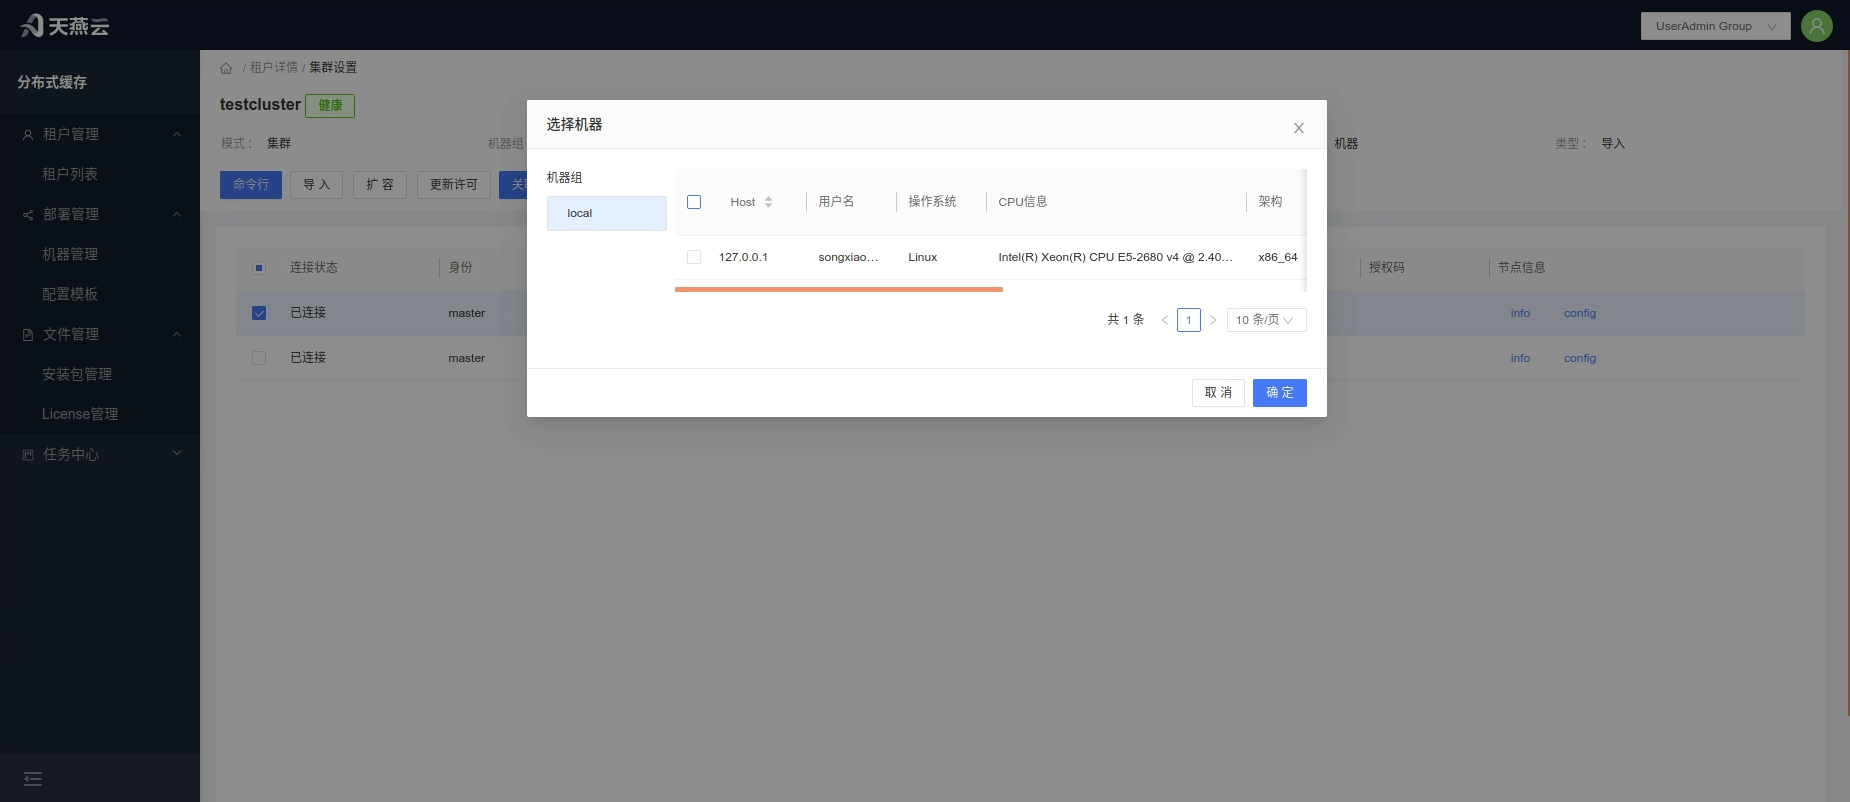
Click the [Settings] button in the cluster information bar on the homepage to enter the cluster settings page. Select the corresponding node and click the [Associate Machine] button to associate the imported node with machine information, providing complete management functions for the node.
# Start, Stop, Restart, Delete Nodes
Select the corresponding nodes and click [Stop], [Restart], [Start], [Delete] buttons to perform node stop, start, restart, and delete operations. Batch operations are supported.
# Tenant Functions
# Service Management
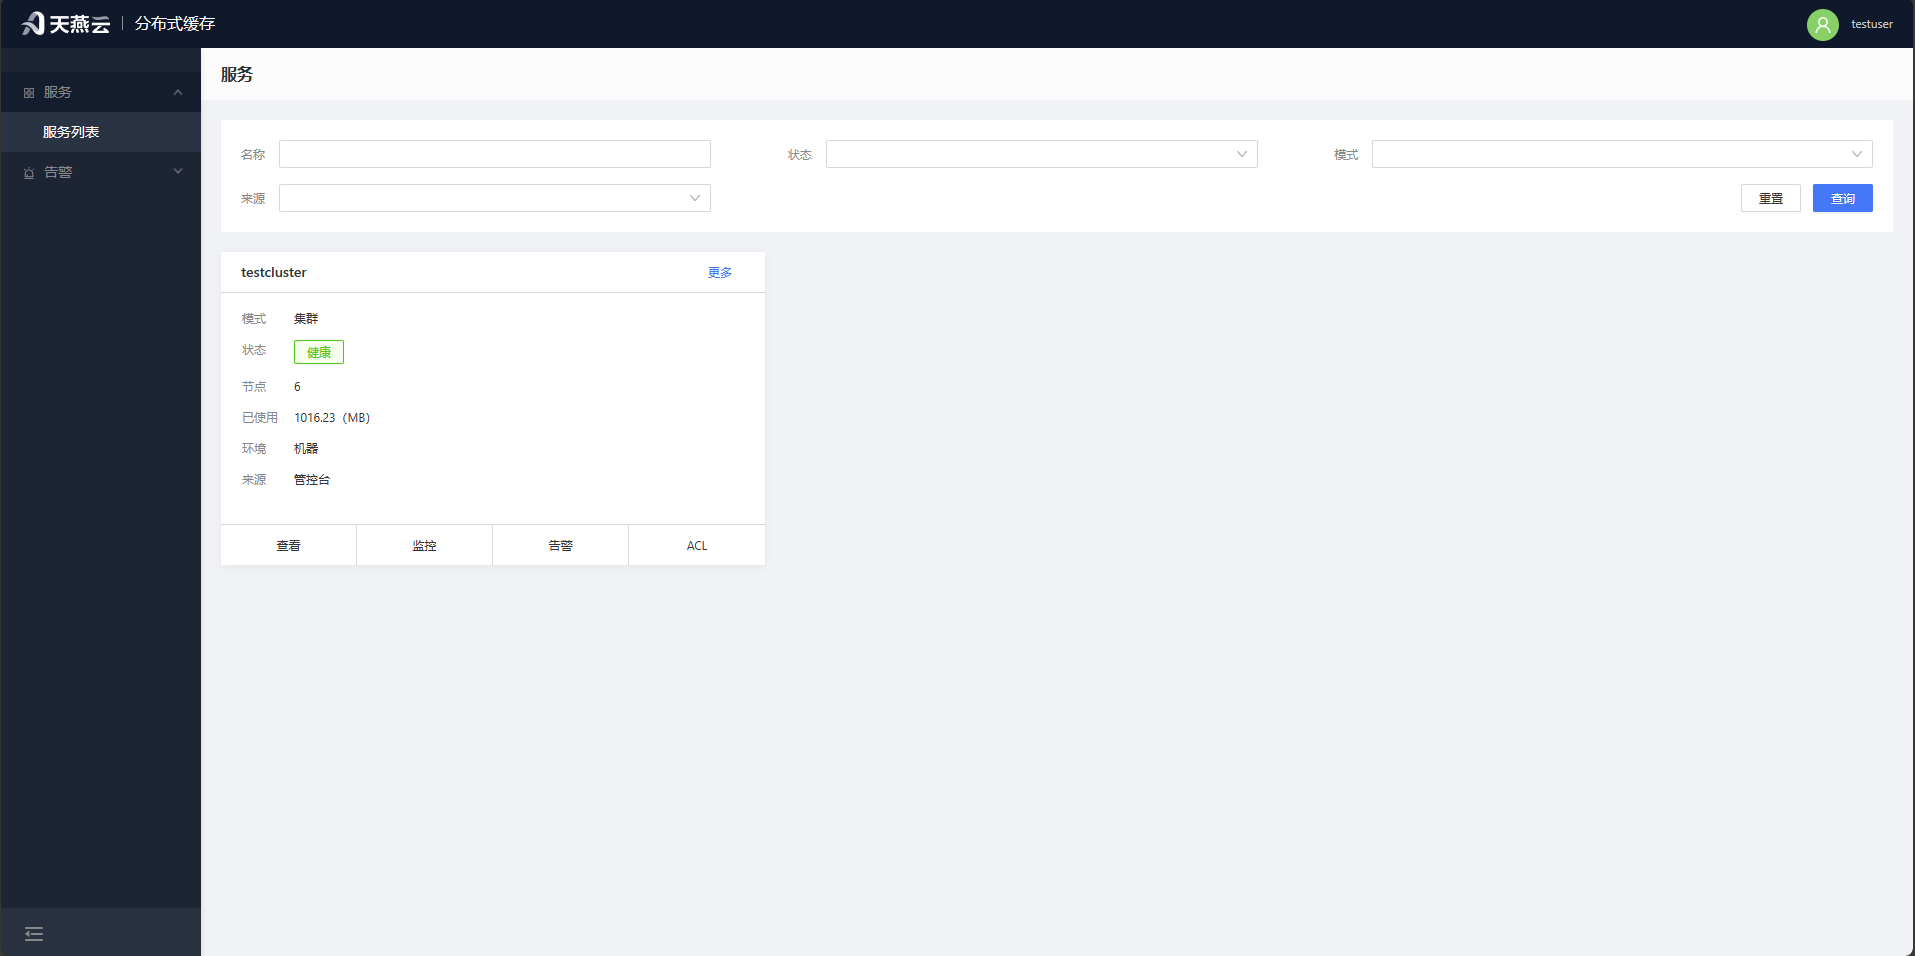
[Service List] provides entry points for cluster browsing, cluster monitoring, cluster alerts, cluster settings, cluster editing, and cluster deletion operations.
# Command Line
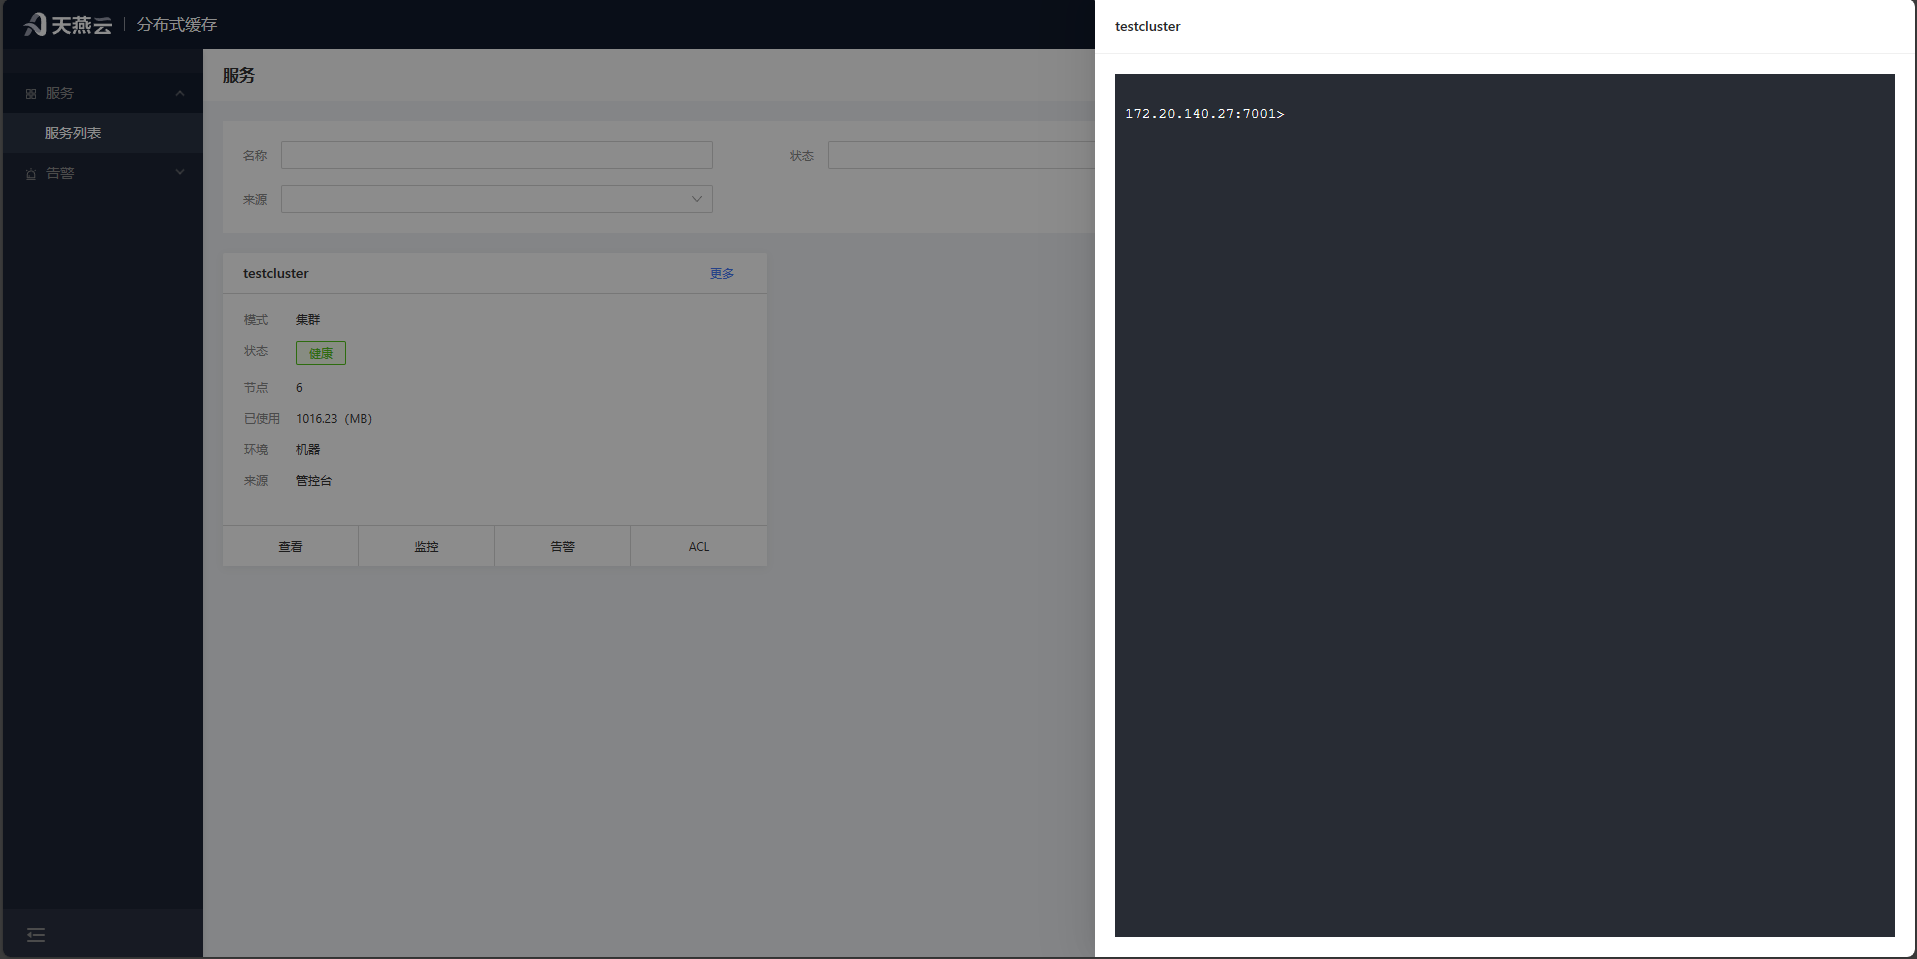
Click [Service List], select a cluster's [More-Command Line] button to enter the cluster command line interface, where you can simulate cluster client interaction.
# ACL Management
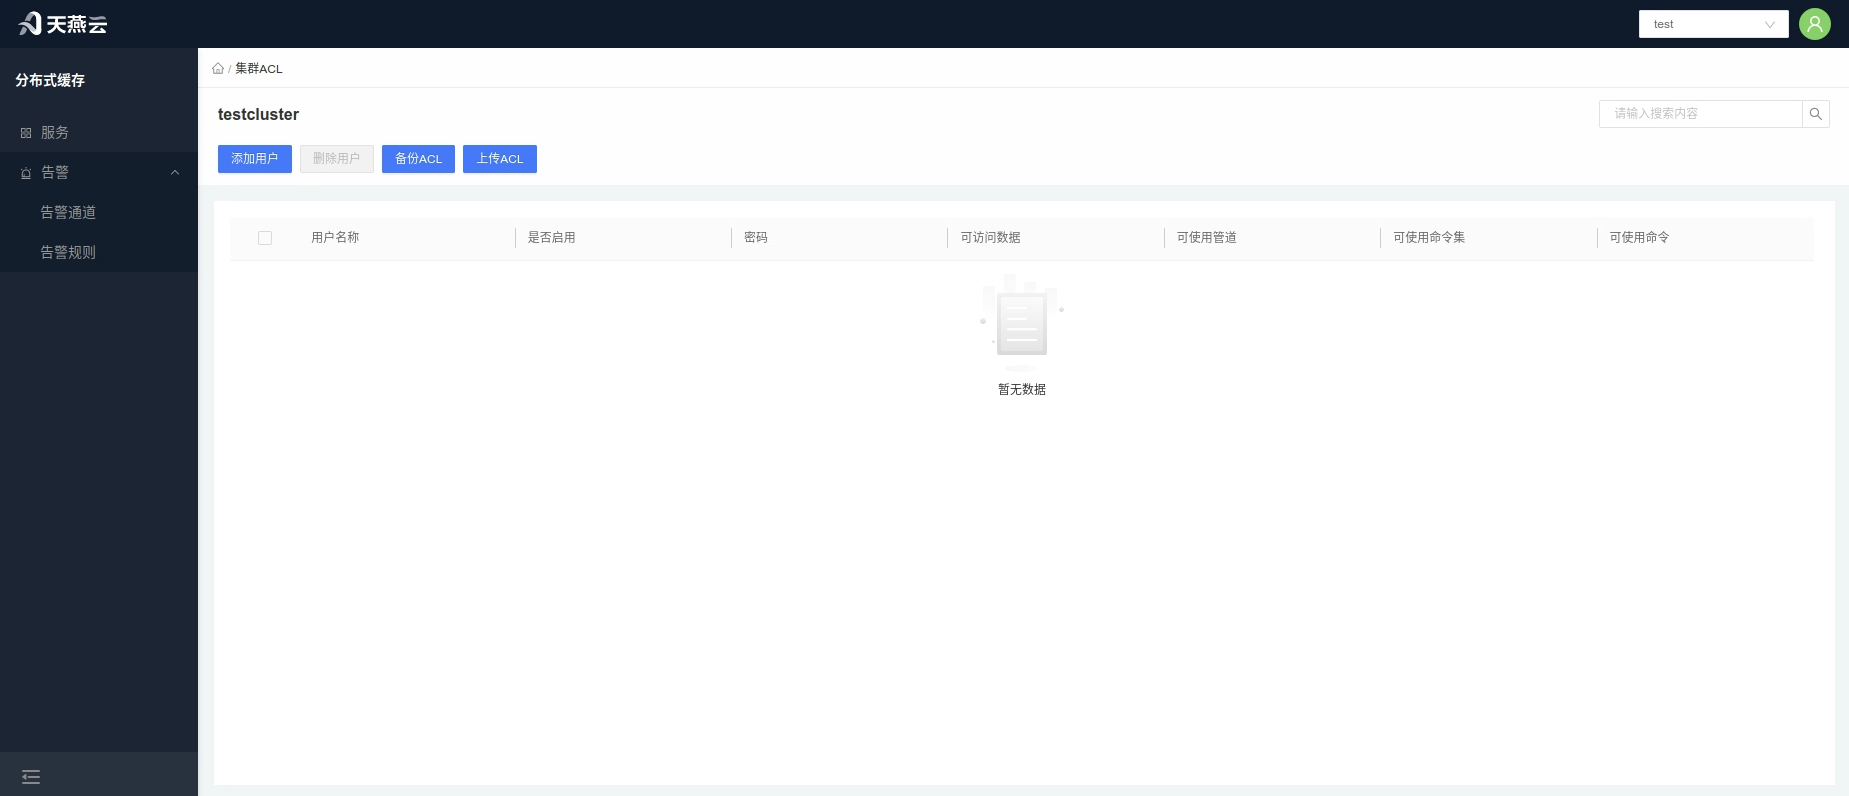
Click [Service List], select a cluster's [ACL] button to enter the cluster command line interface, where you can simulate cluster client interaction.
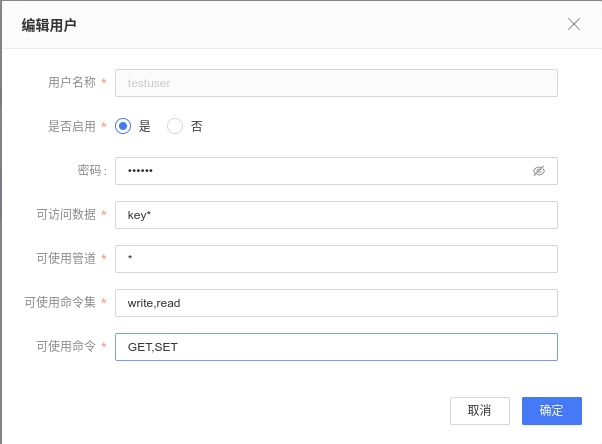
Corresponds to acl setuser username >password on ~* &* +@all(+command) to explain.
| Parameter | Description |
|---|---|
| Username | Name of the new user |
| Enabled (on/off) | Enable or disable this user |
| Password (>password) | User password |
| Accessible Data (~*) | Regular expression matching accessible data |
| Usable Command Set (+@all) | Command set name in acl cat list |
| Usable Channels (&*) | Regular expression matching accessible pub/sub channels |
| Usable Commands (+command) | Specific commands in acl cat |
All parameters do not need to add prefix symbols (such as: >, ~, &, +@, -@, +, etc.), as shown in the figure below
# Cluster Settings
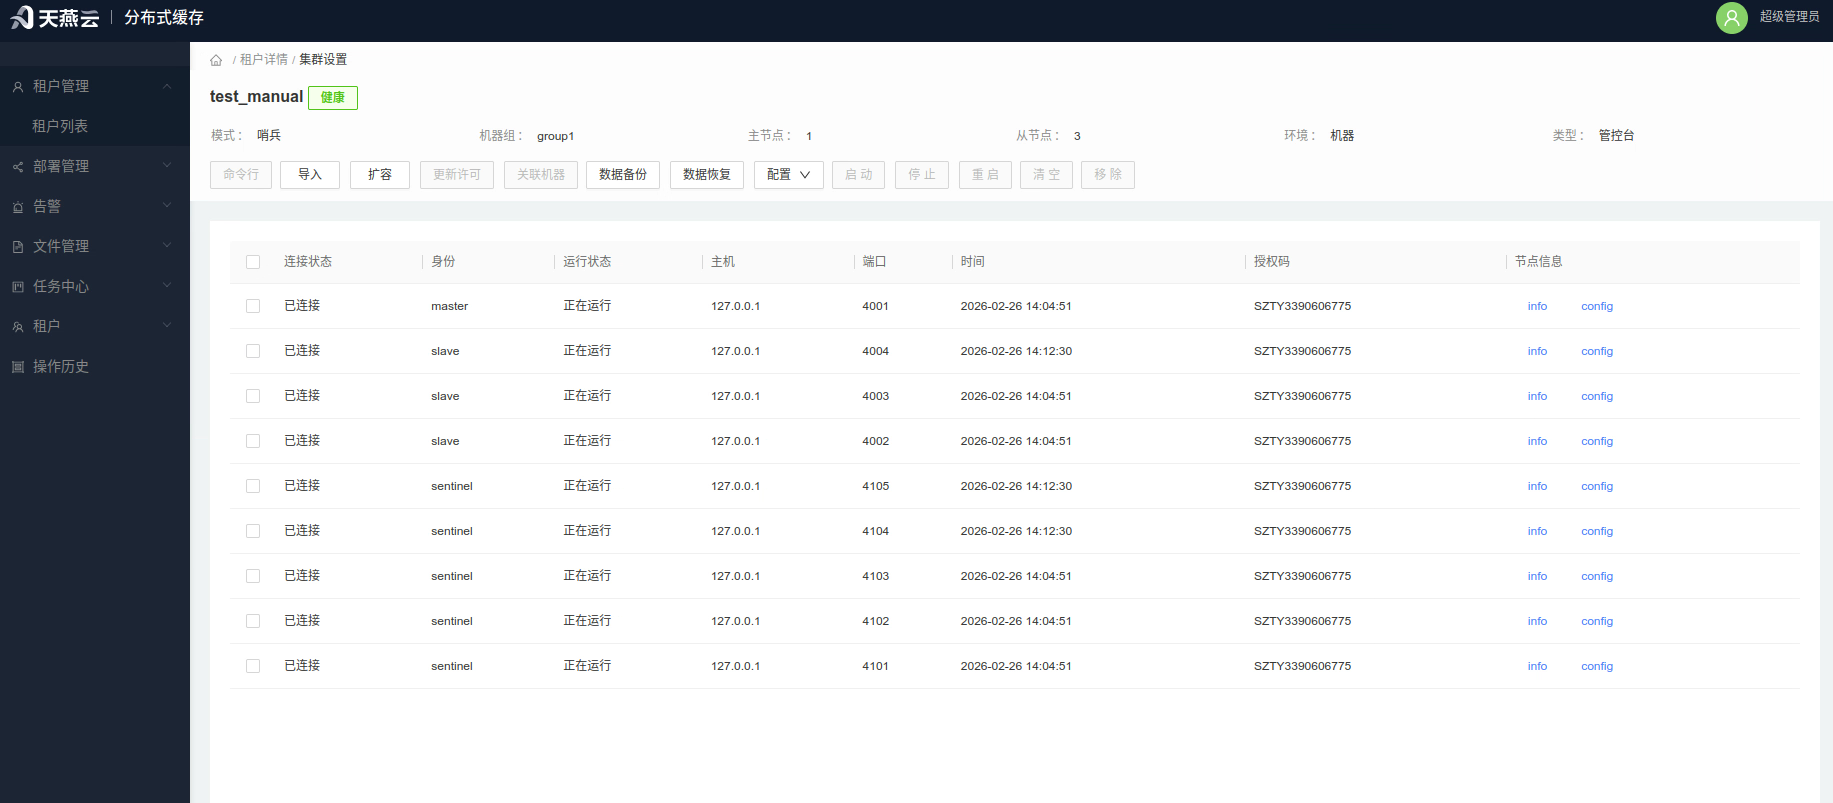
Cluster settings provide AMDC service configuration modification, node add/delete/modify, cluster memory clear, cluster removal, cluster node stop/start/restart/delete, cluster info/config information viewing, machine association, data backup, cluster scaling, and import operations.
# Clear Cluster Memory
Select the corresponding node and click [Clear] to clear the current node's distributed memory.
# Start, Stop, Restart Nodes
Select the corresponding nodes and click [Stop], [Restart], [Start] buttons to perform node stop, start, and restart operations.
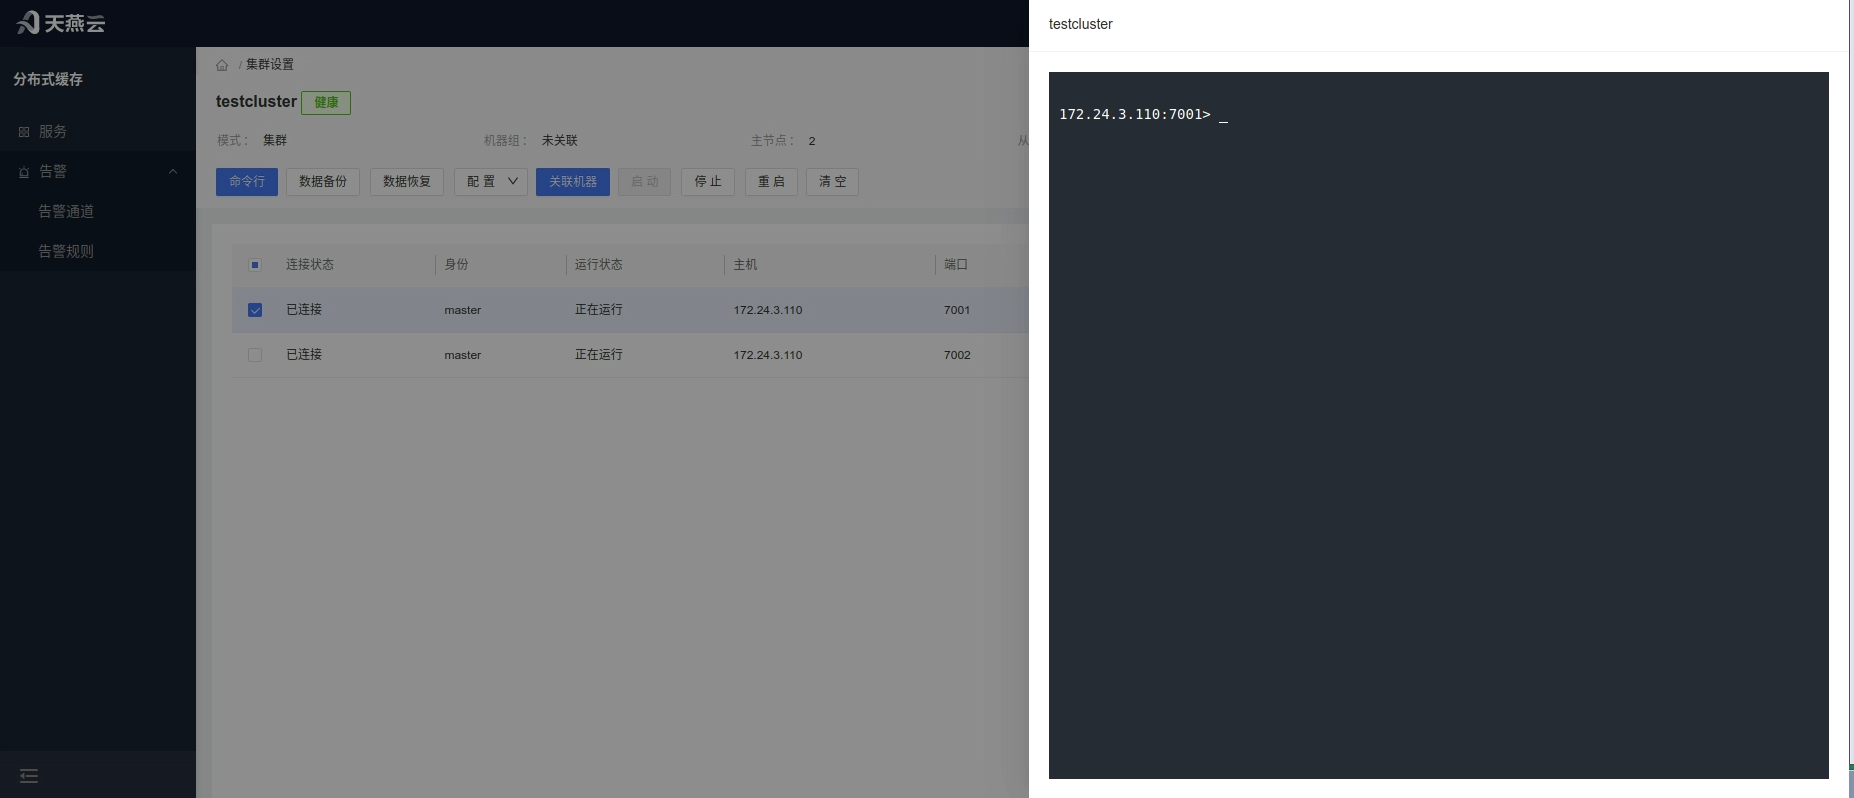
# Service Command Line
Enter [Cluster Settings] and click the [Command Line] button in the service to enter the command line interface.
# Data Backup
Click the [Data Backup] button. After clicking, a download prompt will appear, backing up all node data in the service to local.
# Data Recovery
Click the [Data Recovery] button to open the upload tar.gz/.rdb file and restore data to the service.
# Configuration
Click the [Configuration] button to open a dropdown list with two options:
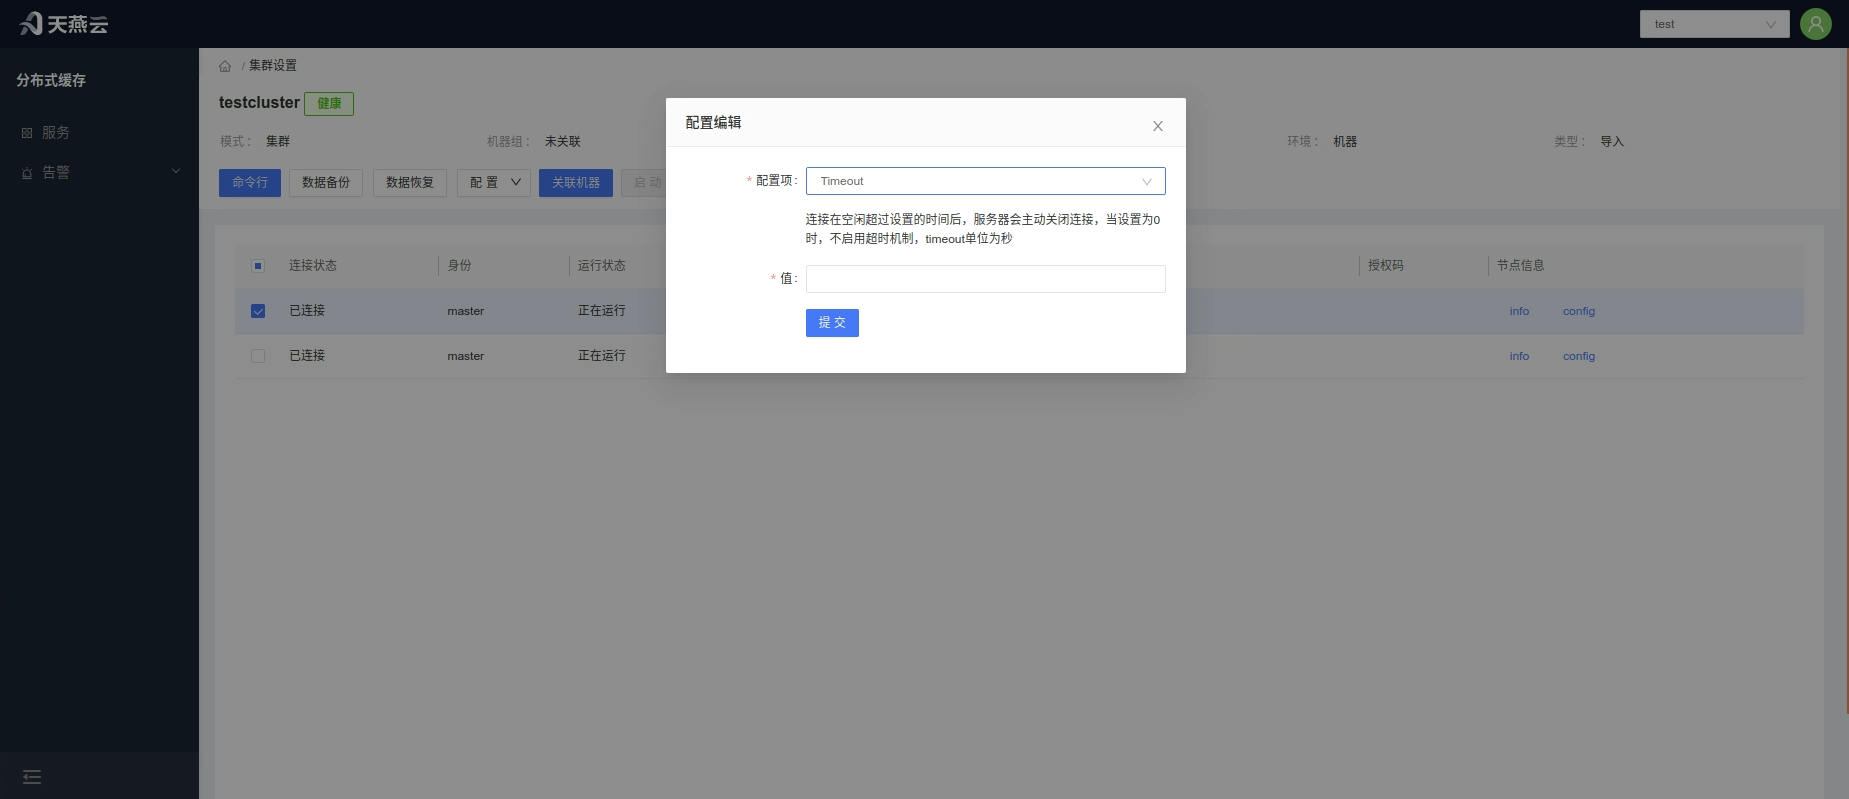
- Dynamic Update - Configuration takes effect in real-time; 2. Static Update - Can update all configurations, updated content takes effect after node restart.
Dynamic Update:
In the popup, select the configuration item to update, enter the new configuration parameter, and click [Confirm].
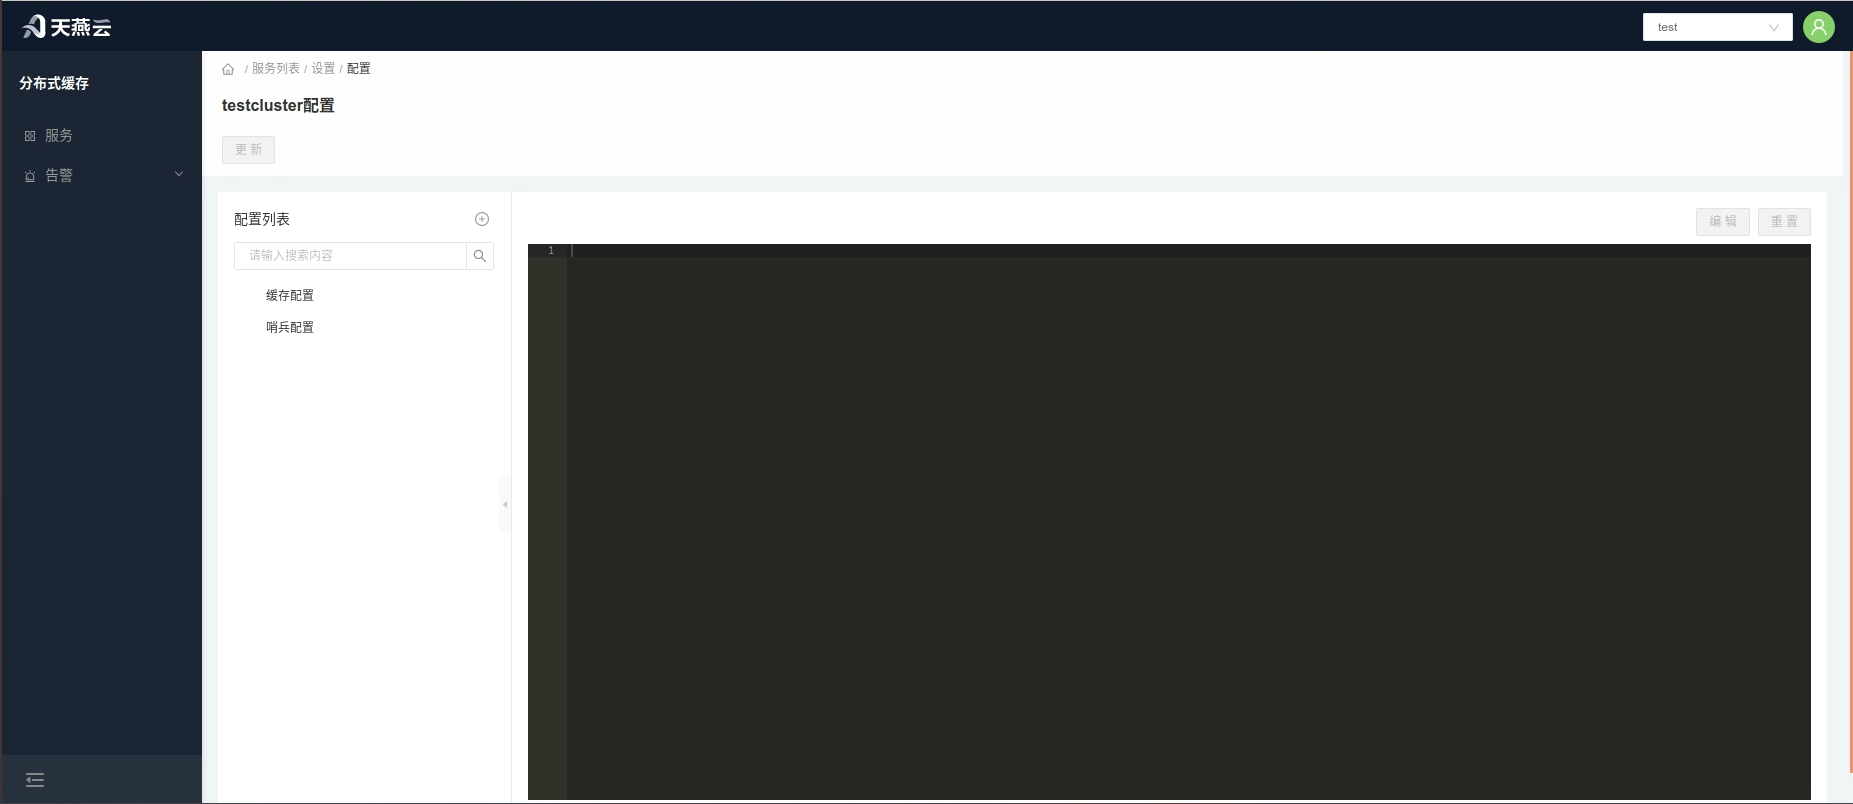
Static Update:
Jump to the [Configuration Template Page], after modification is complete, click [Confirm].
# Alerts
Alert is an additional function of cache monitoring that automatically sends alerts when cache triggers alert rules, notifying recipients.
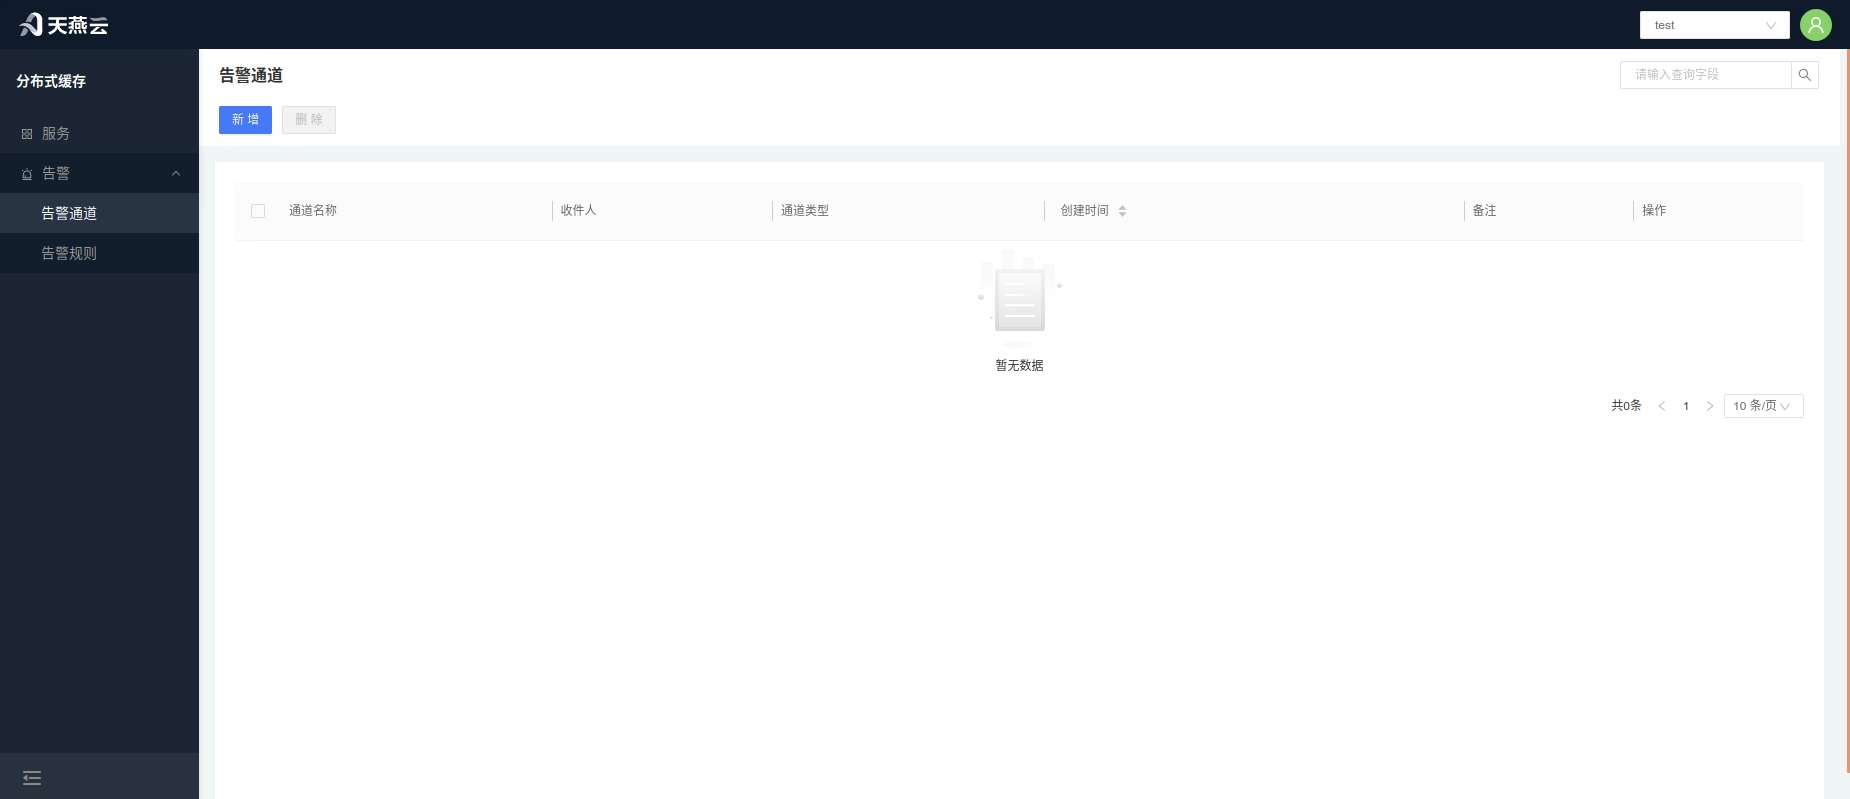
# Alert Channel
Alert channel refers to the notification method for notifying recipients. AMDC console provides Email form of alert channel.
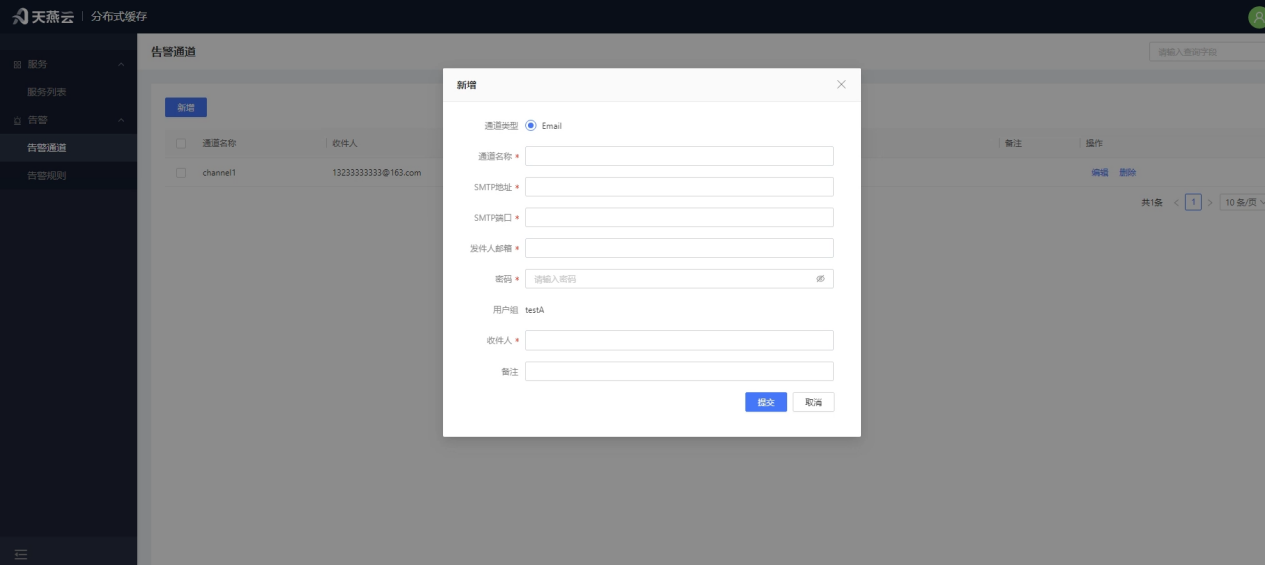
# Add Alert Channel
Click [Alert - Alert Channel] on the homepage to enter the alert channel homepage, click the [Add] button to add an alert channel.
| Parameter | Description |
|---|---|
| Channel Name | Custom |
| Channel Type | |
| SMTP Address | Mail transfer protocol server |
| SMTP Port | Port used by mail server |
| Sender Email | Username for sending email |
| Password | Sender's email password |
| Recipients | Users under current tenant, can select multiple, notify multiple people simultaneously |
| Remark | Remark information |
# Edit Alert Channel
Click [Alert - Alert Channel] on the homepage to enter the alert channel homepage, select the alert channel to edit and click the [Edit] button on the right side of the alert channel list to edit the alert channel.
# Delete Alert Channel
Click [Alert - Alert Channel] on the homepage to enter the alert channel homepage, select the alert channel to delete, click the [Delete] button on the right side of the alert channel list, and click [Confirm] in the confirmation box to delete the alert channel.
# Alert Rules
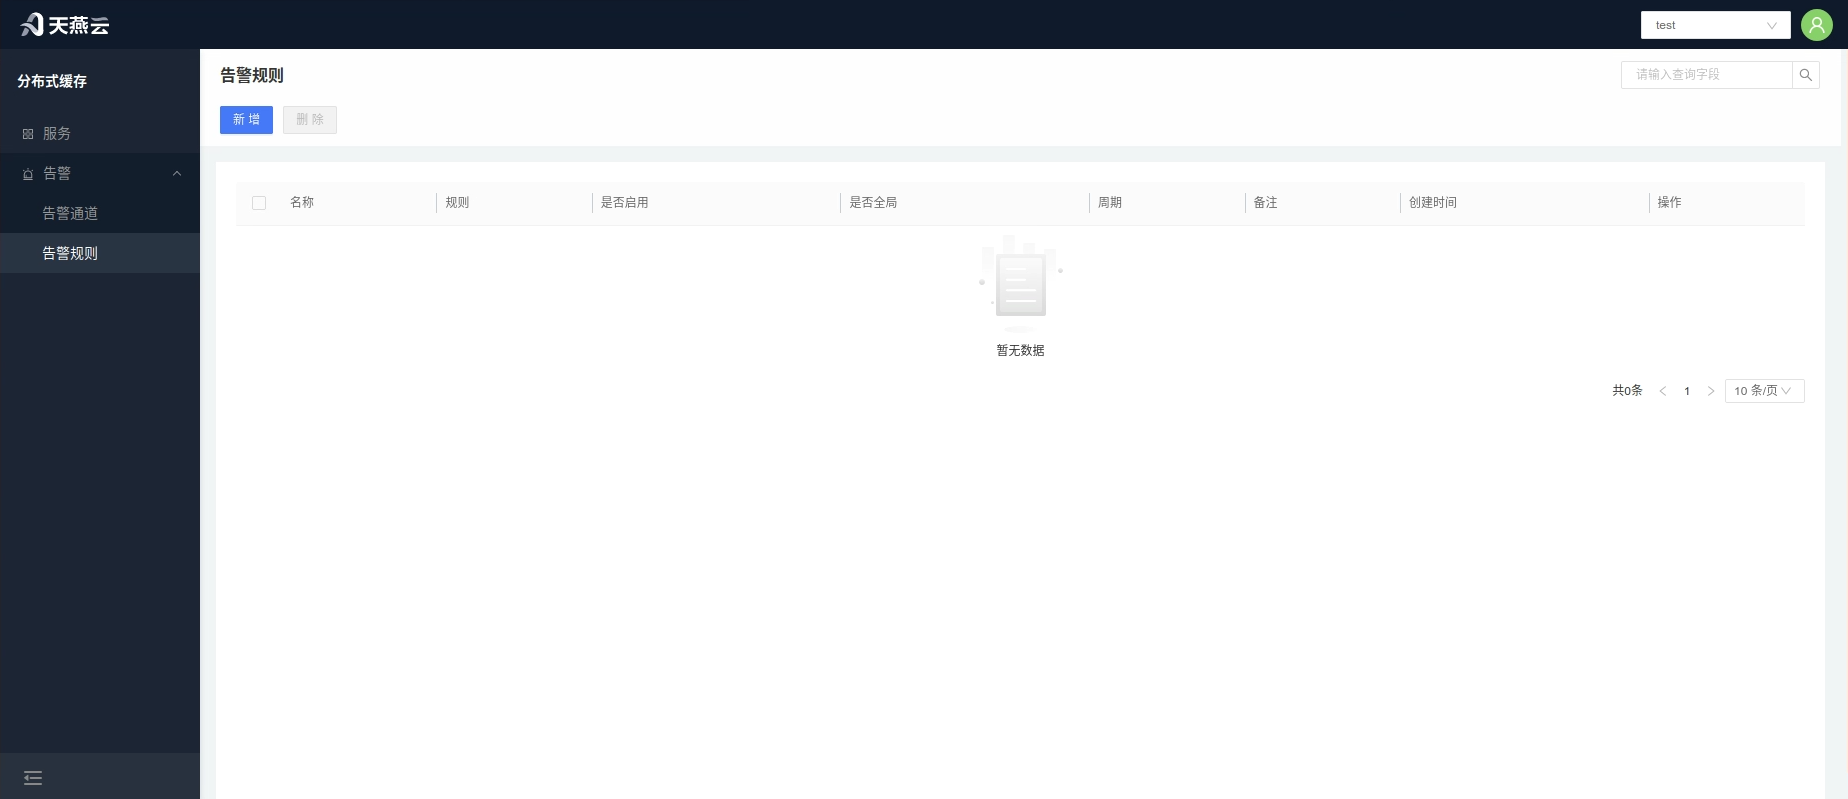
Set alert rules in the console. When conditions are met, alerts will be triggered within the set time! Send alerts according to the set frequency!
# Create Alert Rule
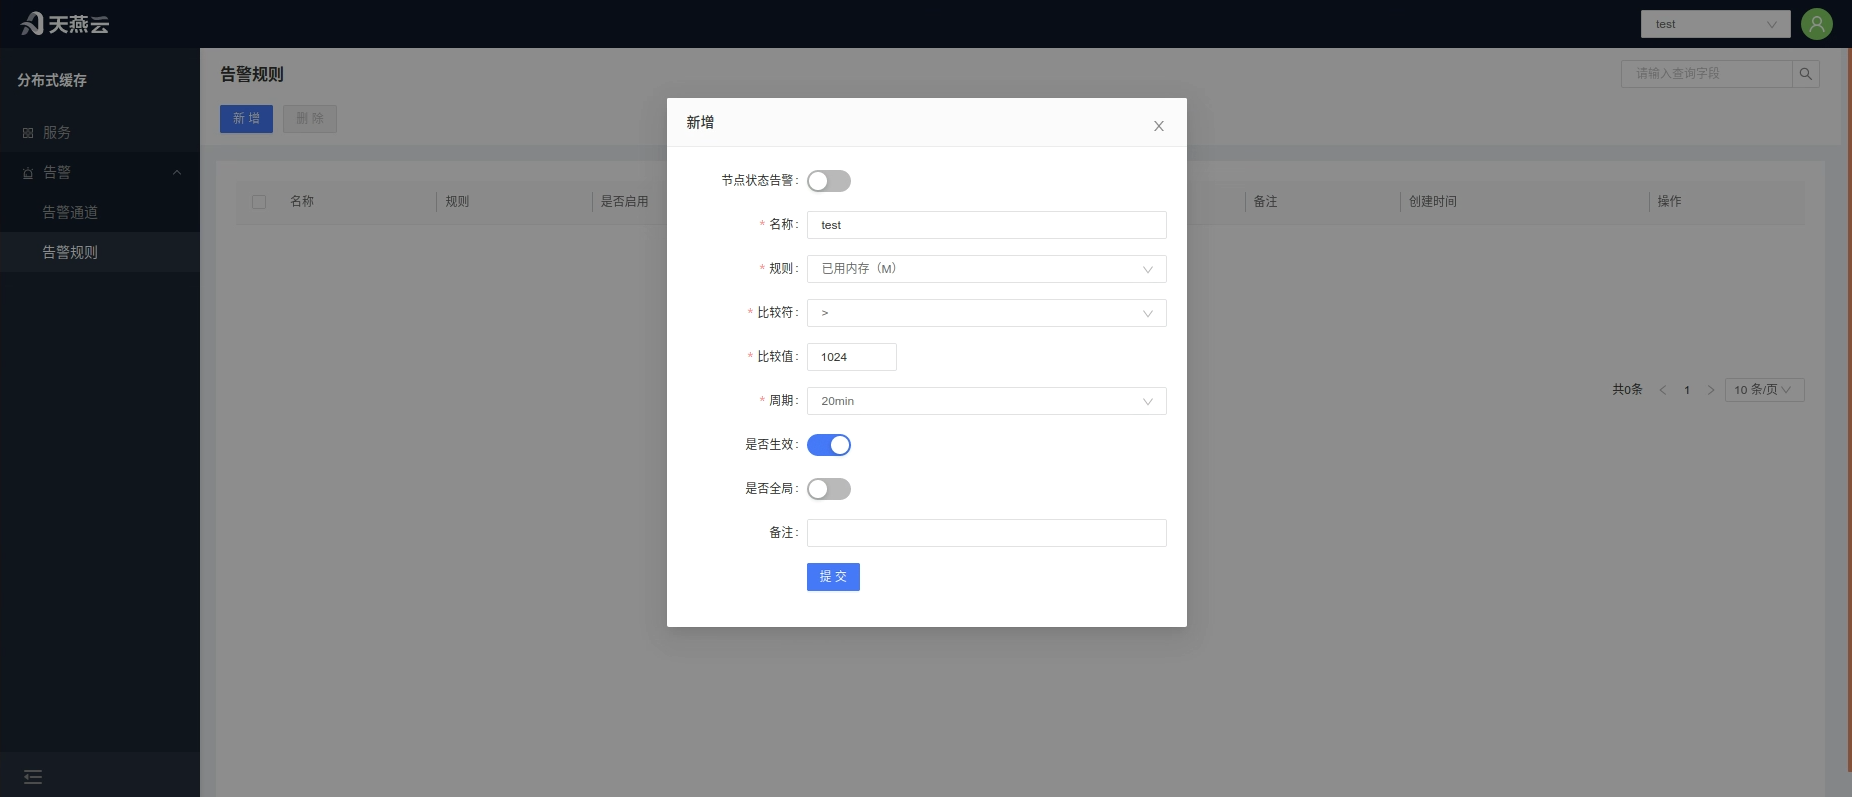
Alert rules are divided into global alert rules that are effective for all clusters and local alert rules that are effective for individual clusters. Individual cluster alert rules need to be added in the cluster (refer to ##### Add Cluster Alert Rule). Turning on the global switch makes it effective for all clusters. Click [Alert - Alert Rules] on the homepage to enter the alert rules homepage, click the [Create] button in the upper right corner of the page to create an alert rule.
- Node Status Alert: Node alert switch, when turned on, node alert is enabled
- Rule Name: Custom alert rule name
- Rule: Set conditions for alert trigger
- Comparison Operator: Comparison operation selection
- Comparison Value: Enter alert comparison value, alert will be triggered when this value is met
- Period: Rule check period (minutes): 5, 10, 15, 20, 30, 45, 60, 120 (min)
- Is Enabled: When switch is on, alert rule is enabled
- Is Global: Default is No. When Global is selected, this rule will be applied to all clusters of the current tenant
# Edit Alert Rule
Click [Alert - Alert Rules] on the homepage to enter the alert rules homepage, select the corresponding alert rule, click the [Edit] button on the right side of the list to edit the alert rule.
# Delete Alert Rule
Click [Alert - Alert Rules] on the homepage to enter the alert rules homepage, select the alert rule to delete, click the [Delete] button on the right side of the list to edit the alert rule. You can also select multiple alert rules and click the [Delete] button in the upper left corner for batch deletion.
# Service Alerts
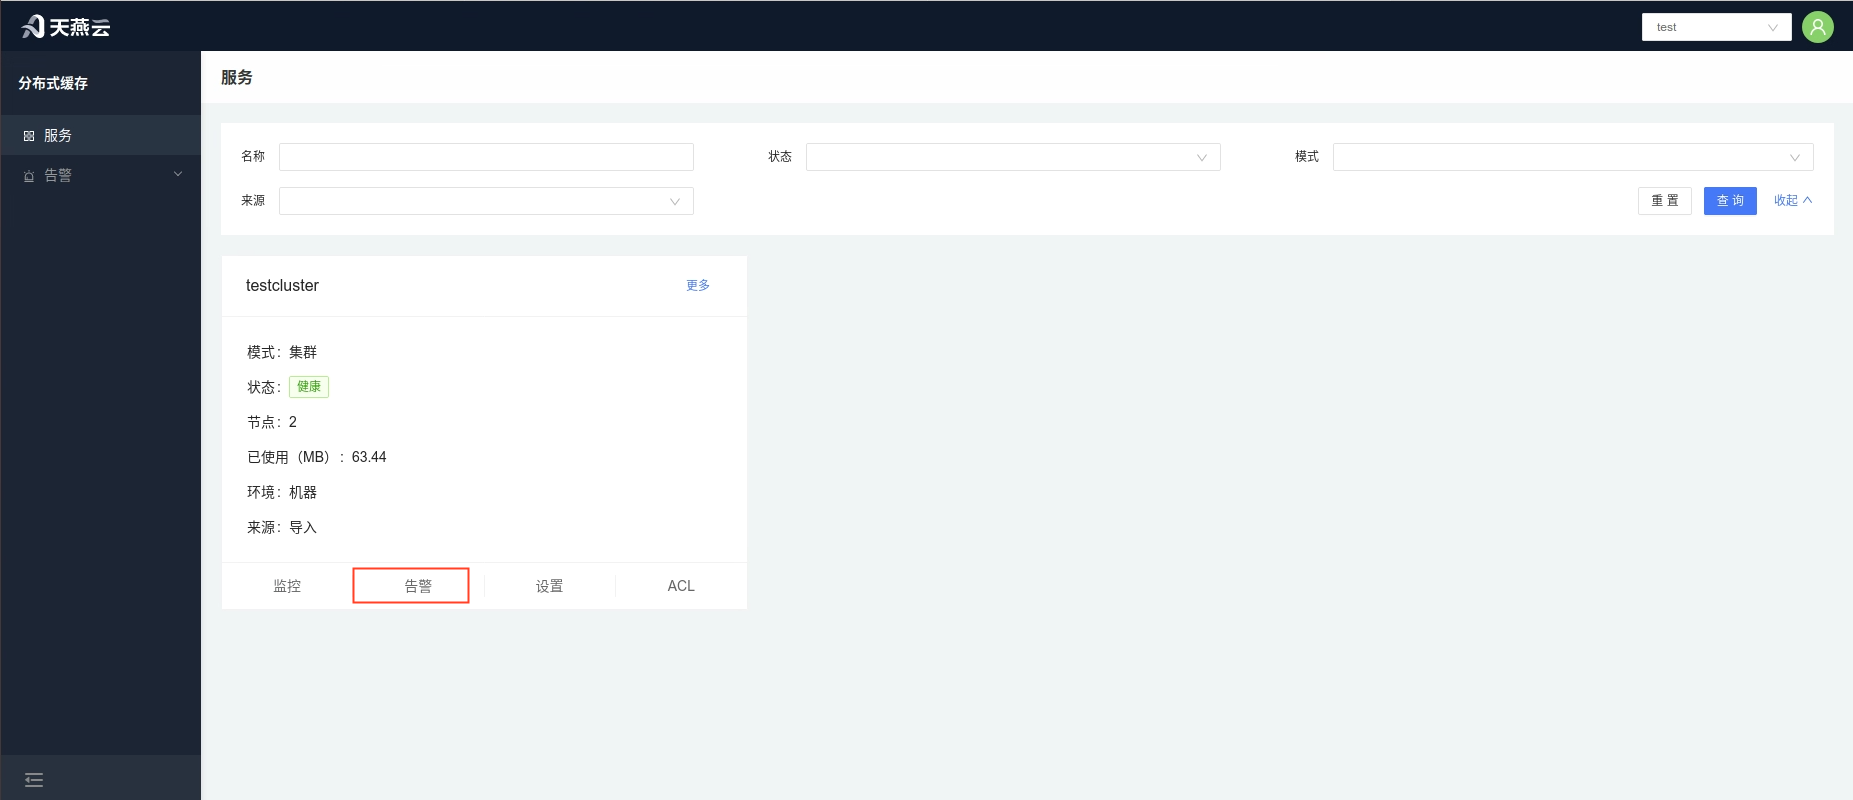
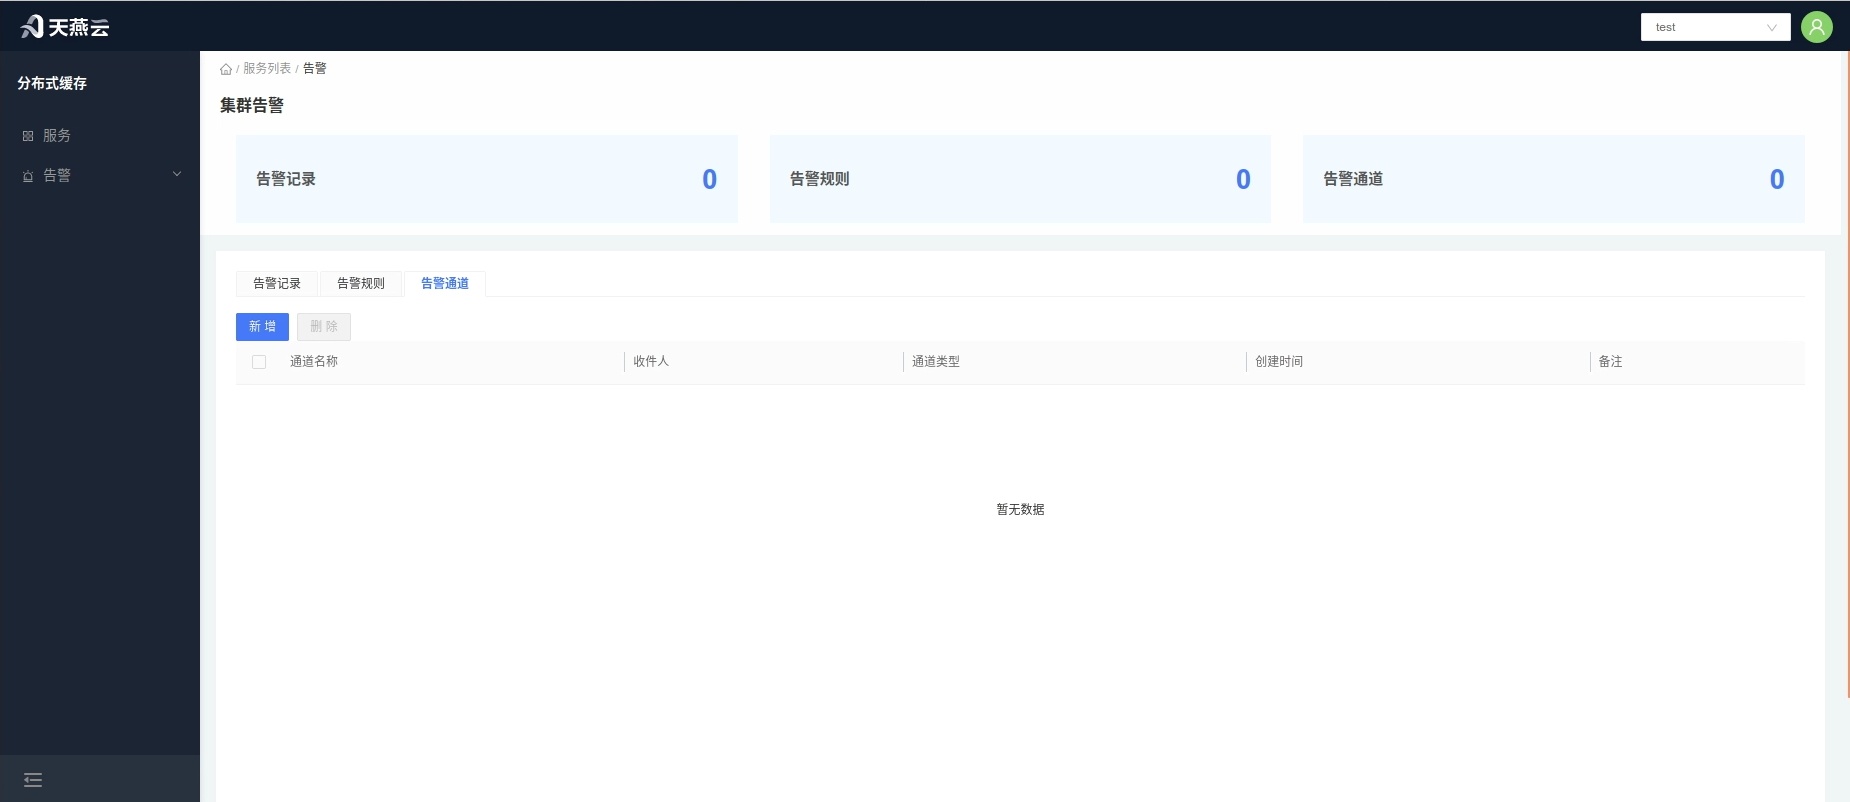
Click [Service] on the homepage to enter the cluster management homepage, click the [Alert] button under the cluster column to enter the cluster alert page, which displays current cluster alert information, including current cluster alert records, current cluster alert rules, and current cluster alert channels.
# Add Service Alert Channel
Steps to add cluster alert channel:
Add an alert channel in [Alert] > [Alert Channel] (refer to Create [Alert Channel]).
Enter [Settings] > [Alert], switch to the alert tab, click the [Add] button, select the corresponding alert channel to add.
# Add Service Alert Rule
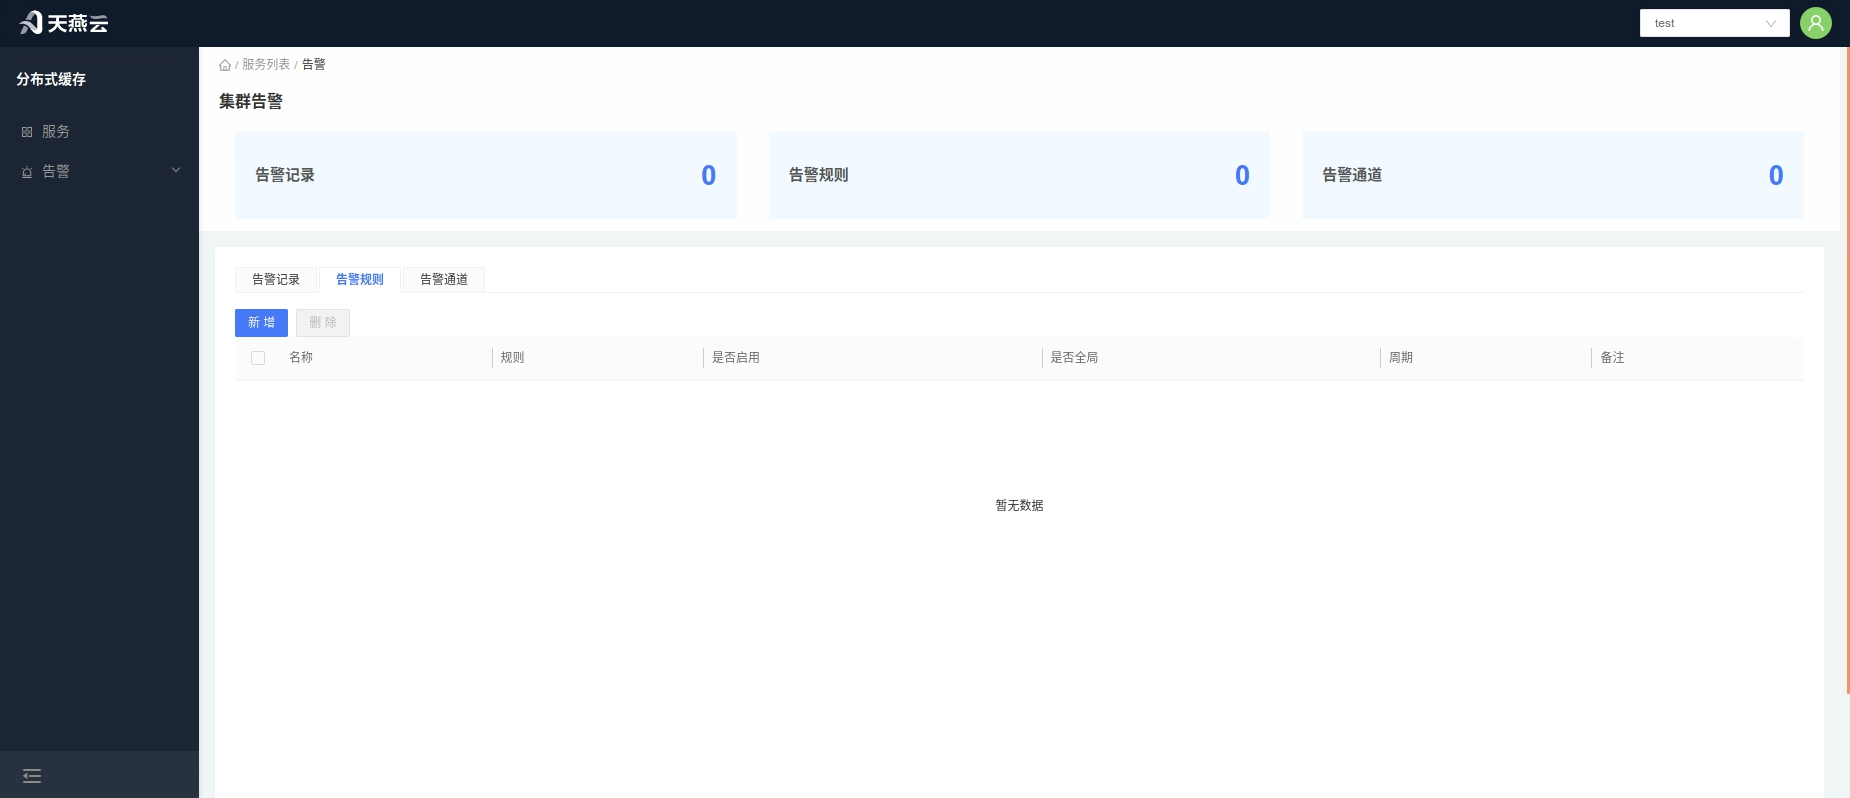
Alert rules are divided into global alert rules and local alert rules. Global alert rules are effective for all services without needing to add. Alert rules added for individual clusters can only add local alert rules. Add global alert rules (refer to Add Alert Rule). Steps to add cluster alert rule:
Add an alert rule in [Alert] > [Alert Rules], turn off the global switch (refer to Add Alert Rule).
Enter [Service List] > [Alert], switch to the alert rules tab, click the [Add] button, select the corresponding alert rule to add.
# Three-Administrator Management
There are three special roles: System Administrator, Security Officer, and Security Auditor. Special roles have exactly one account each, generated when the system starts, with passwords that cannot be changed (encrypted in the configuration file).
- System Administrator is responsible for creating tenants and accounts, with tenant management and user management menus;
- Security Officer is responsible for assigning tenants and roles (access permissions) to accounts, with authorization management menu;
- Security Auditor is responsible for reviewing console operation logs, with operation log menu.
Console function users are divided into two categories:
- Administrator Account: Administrators are responsible for creating services and maintaining services for tenants;
- Tenant Account: Corresponds to the service data assigned to the tenant, can use these services and some service management functions. Tenant represents an independent environment, and data between different tenants is isolated. Tenants can also manage their own services on the console (by logging in with tenant account), but only have usage rights, not ownership (cannot decide to delete or modify cache cores).
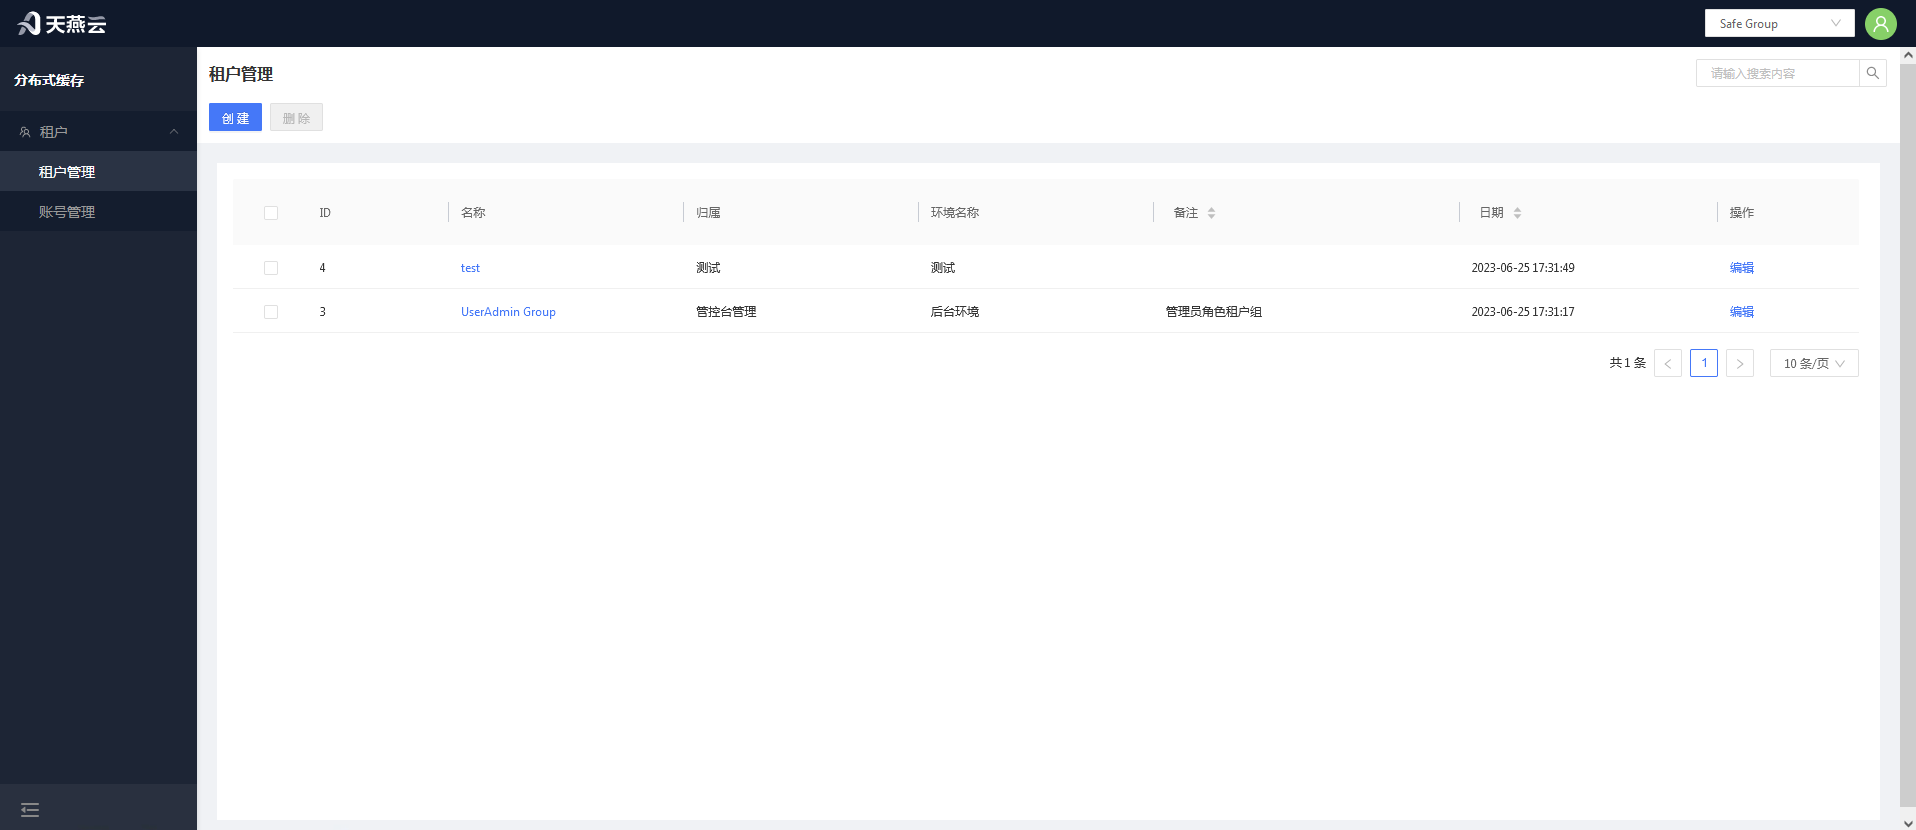
# Tenant Management
Tenant management is used to create, edit, and delete user-owned tenants. Mainly used to distinguish AMDC clusters that users can manage.
# Create Tenant
Click the [Add] button in the upper right corner to add a tenant.
# Edit Tenant
Select the tenant to edit and click the "Tenant Name" column to edit the tenant.
# Delete Tenant
Select the tenant to delete and click the [Delete] button to delete the tenant.
# Authorization Management
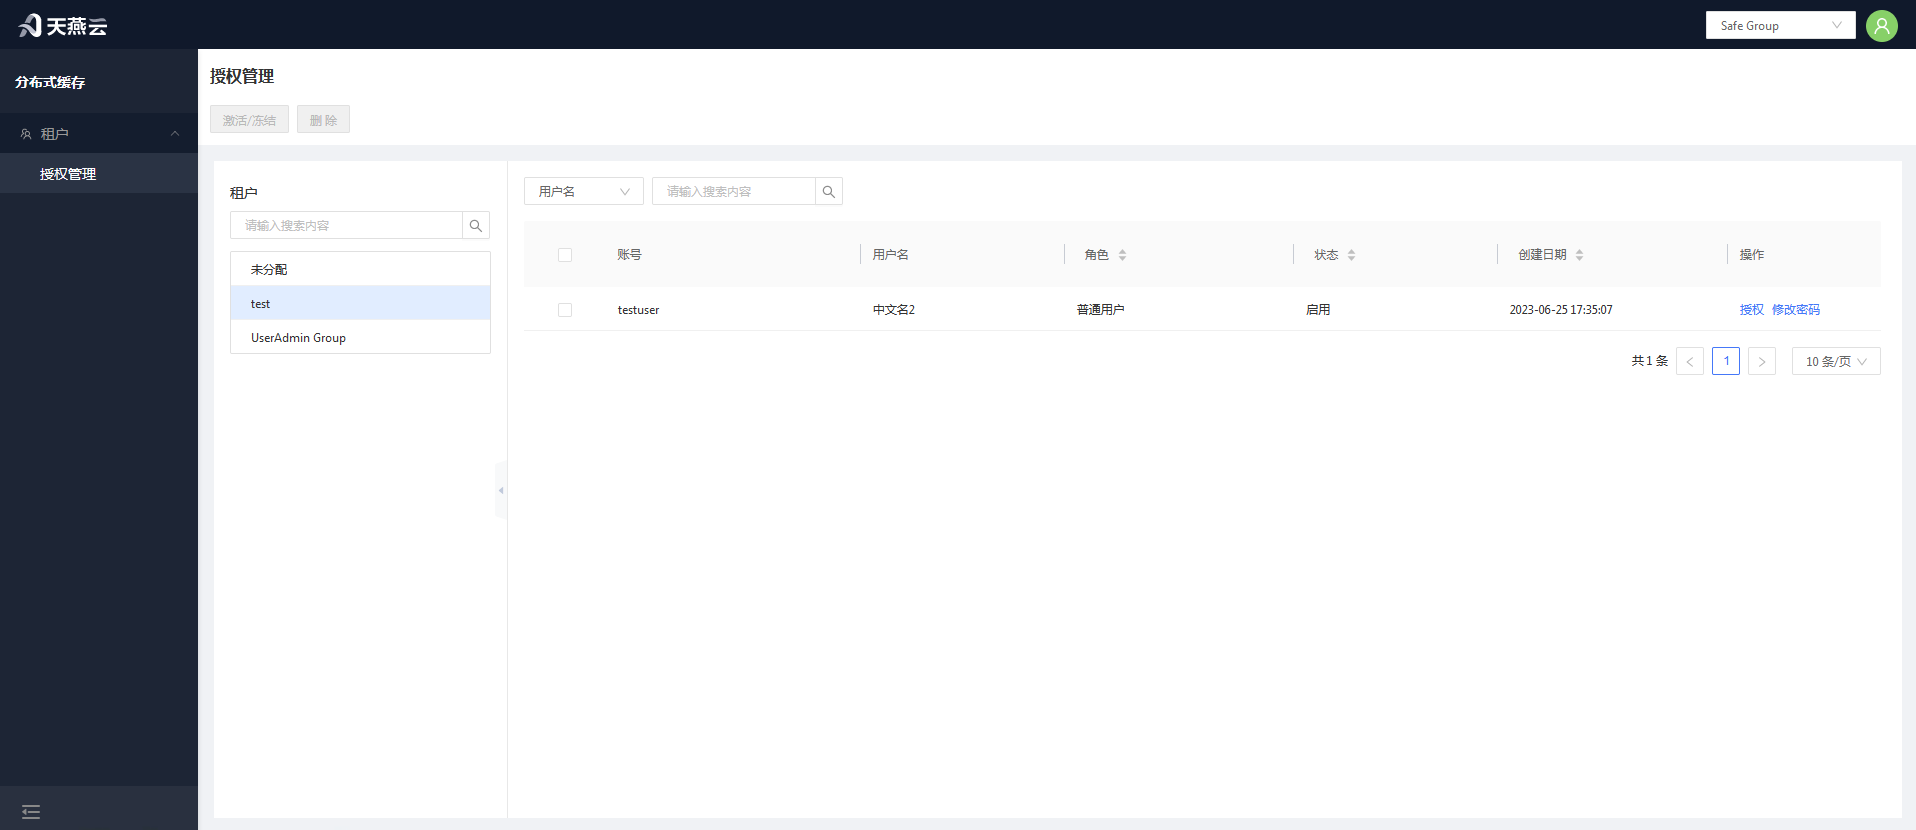
Enter [Users] > [Authorization Management] to enter the authorization management page.
# Authorize Roles
Users in the unassigned group in the tenant are users who have not been assigned to any tenant. These users need tenant authorization first.
# Modify Password
New accounts do not have initial passwords and cannot log in. Passwords must be modified once in authorization management before logging in.
# Activate and Freeze
Click [Activate/Freeze] to activate or freeze the user account. Frozen accounts cannot log in.
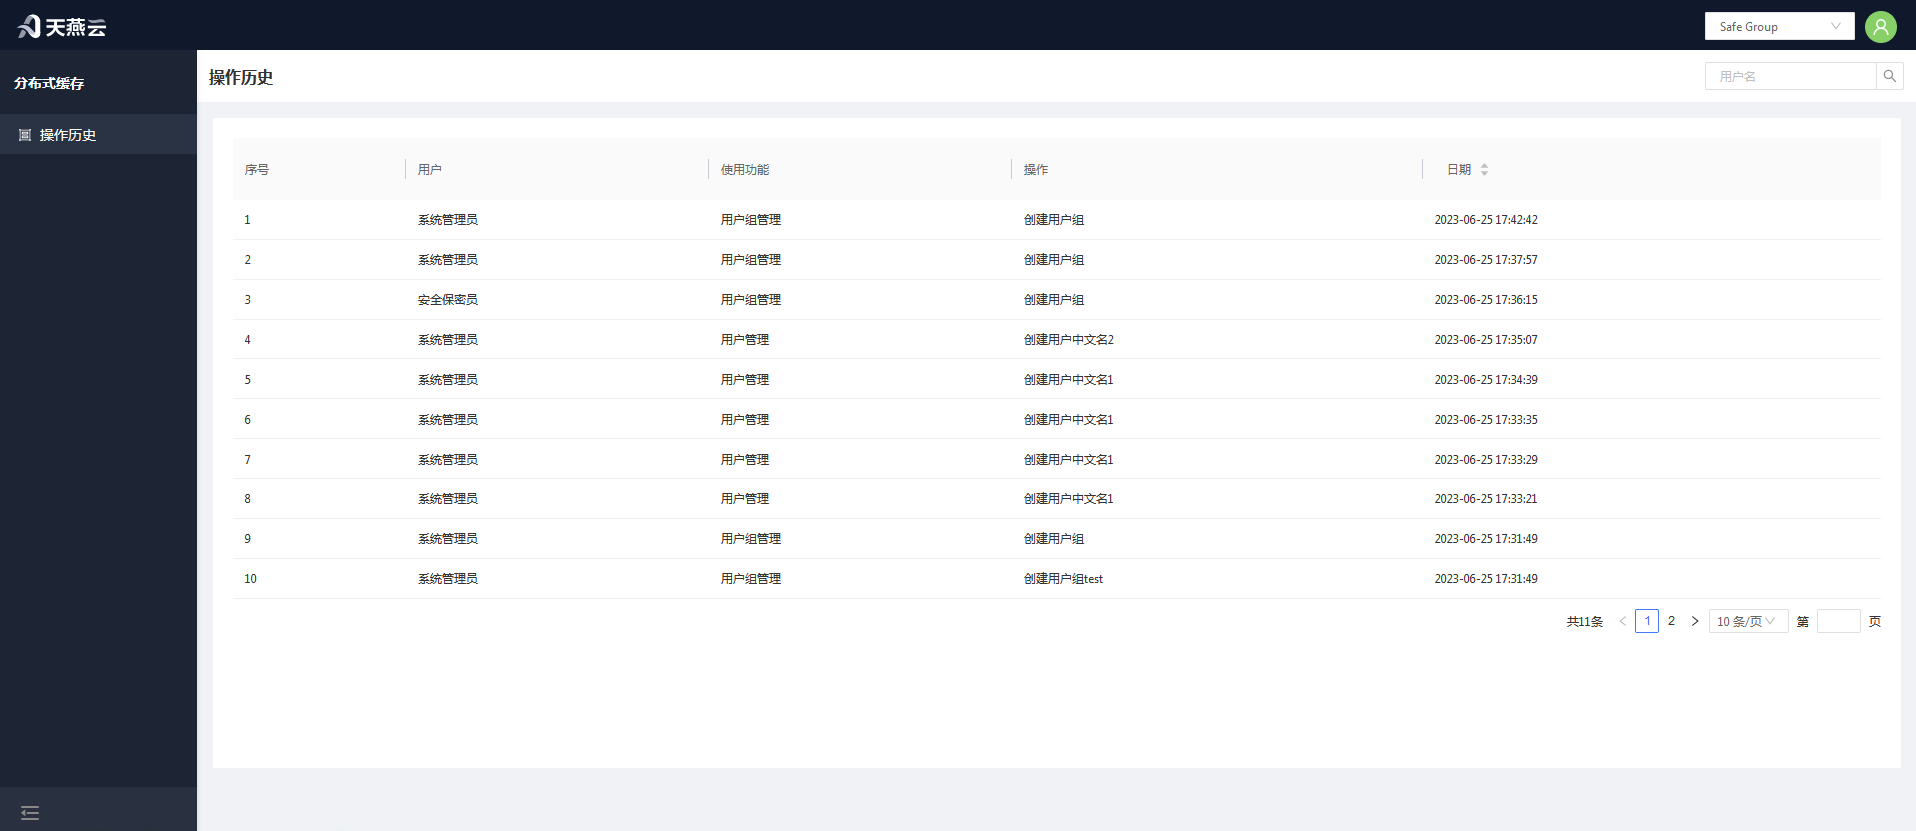
# Operation History
Operation history records all user operation history on the console.
# Password and Security
Password modification instructions: To ensure system security, passwords must be 6 characters or longer and contain special characters. Passwords can be modified through the management platform or through configuration files.
# Initial Passwords for Three Administrators
The three administrators refer to: System Administrator (account: SystemAdministrator), Security Officer (account: KeysKeeper), Security Auditor (account: SafetyAuditor). Initial passwords are all [admin!123]. Note that these three accounts cannot be deleted.
# Modify Current User Password
Log in to the console, click [User Information] in the upper right corner of the homepage. In the user information interface, click the [Change Password] button to modify the current user's login password in the popup.
# Security Officer Modifies User Password
System Administrator can modify "Administrator" and "Regular User" user information. Administrators can modify "Regular User" information. User login to Users > Authorization Management, click the tenant where the user is located, select the user and click the [Modify Password] button to modify that user's password.